Is your baby constantly dropping her pacifier? We'll show you how to make pacifier clips the easy (and CHEAP) way to solve the problem! This pacifier clips DIY would also be a great craft to make and sell.
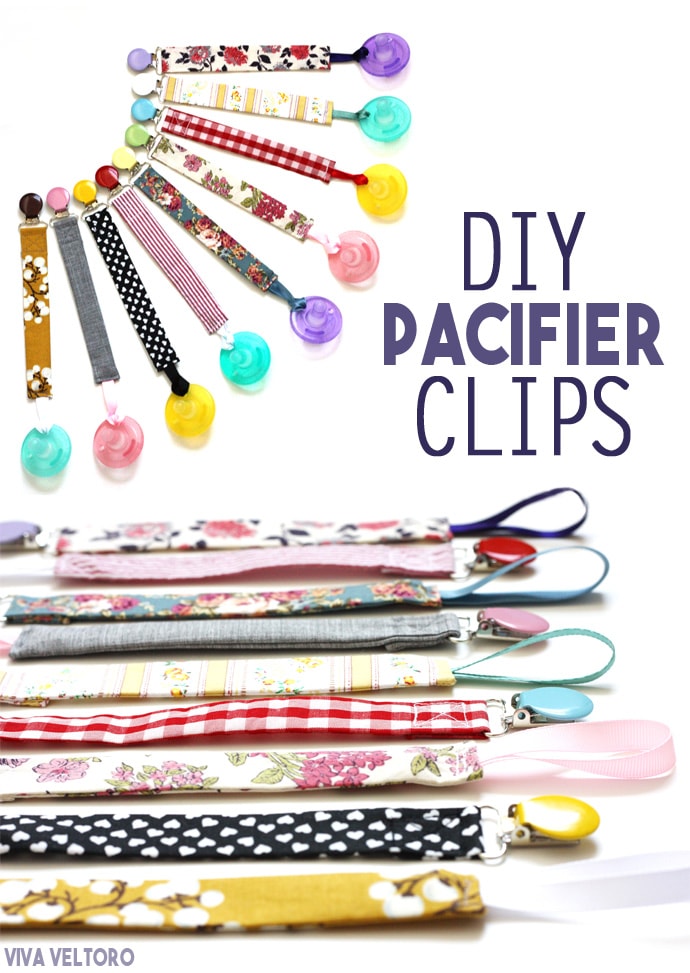
How to Make Pacifier Clips
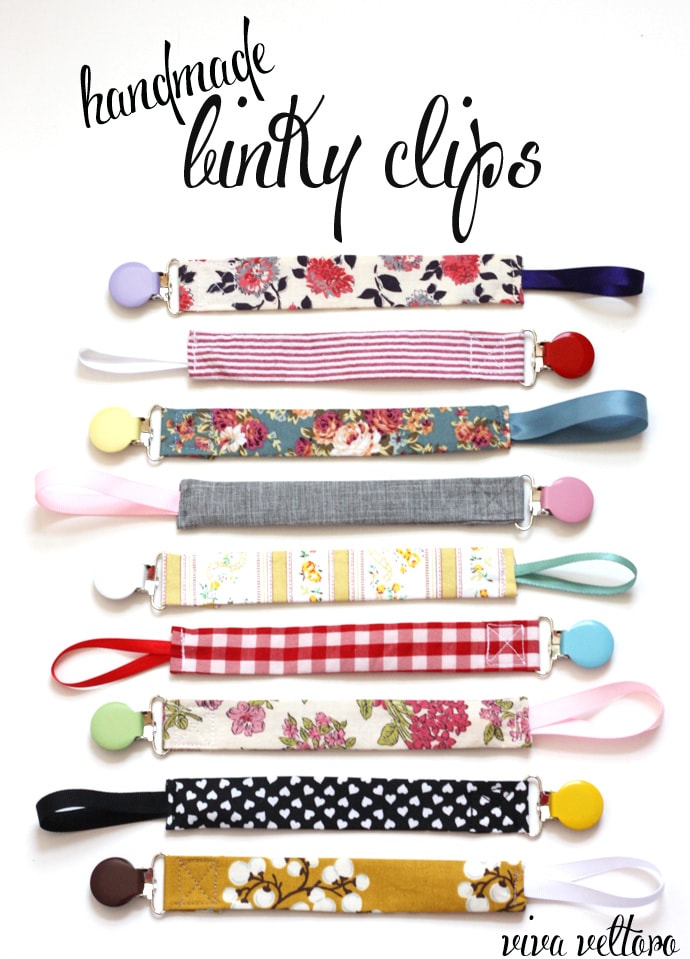
My babies are quite pro-binky, and I don't mind a bit! The only problem I run into is losing them around the house! With our last child, I finally got around to purchasing a pacifier clip just as he was growing out of them. I only wish I had found clips sooner! I decided to be a little more prepared early on this time and figured I could make a handful of super cute binky clips for less than half the price of buying them. Making these nine pacifier clips ended up costing me only $7 since I had the fabric scraps on hand.
Enjoy this fun and easy Pacifier Clips DIY
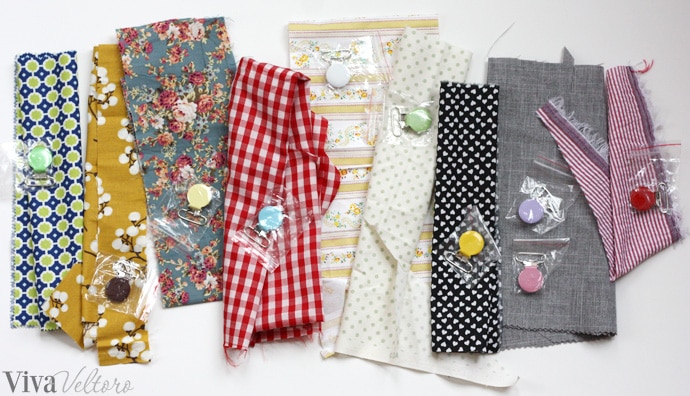
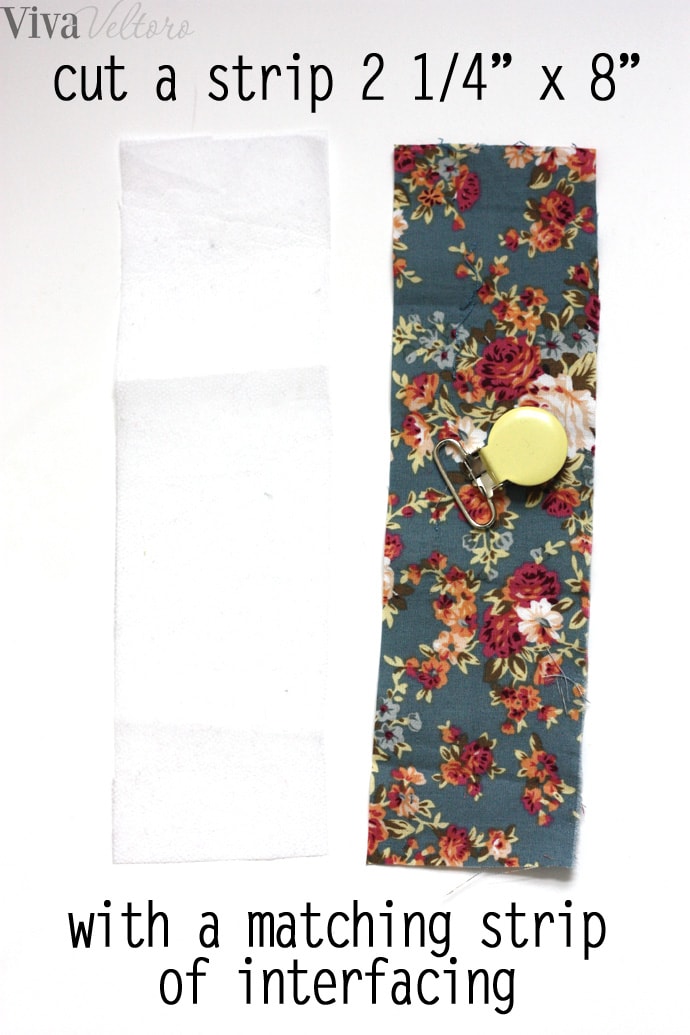
The first step is to gather strips of fabric and cut them along the grain (not on a diagonal) into 2 ¼" by 8" pieces. You need only one strip and one same-size strip of interfacing for each binky clip.
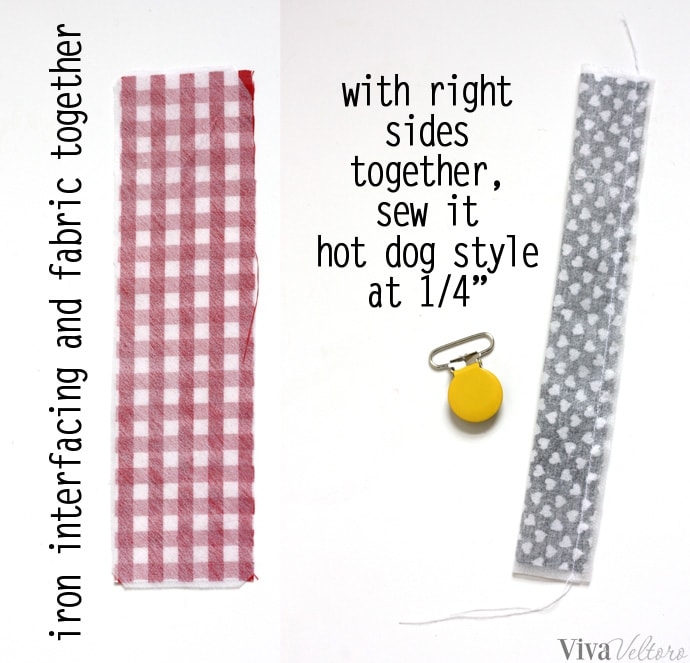
If your interfacing is fusible, iron your two pieces together and sew down one side at ¼" after you've folded it right sides together.
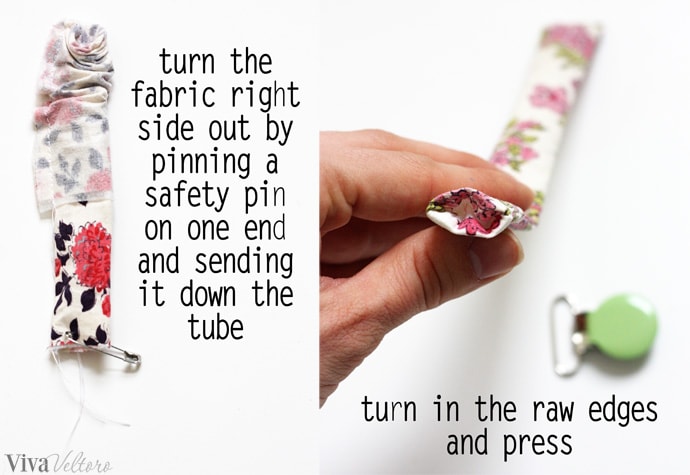
Use whatever method you're most comfortable with to get the tube right side out. I like to attach a safety pin to one end and drop it down the tube then pulling it through. Press everything nice and crisp and fold in the two raw edges. You'll sew them down in the next step.
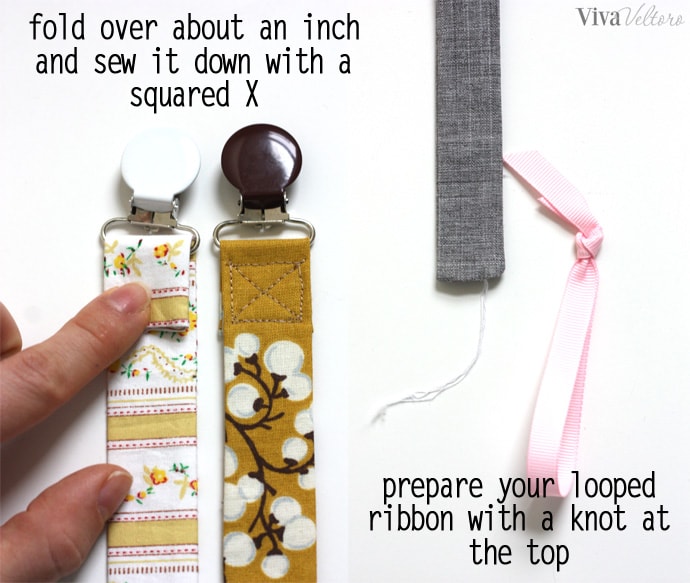
Slide your clip through one end and fold it over about an inch. Sew it down in a criss cross fashion and a square to really secure it down. For the other end, cut a piece of ribbon long enough (perhaps 7 inches depending on the thickness of the ribbon) to tie a knot on one end and still have the loop around 2 ½ inches long. I like grosgrain ribbon a lot because it is strong and stays put, but thinner shiny ribbon works fine too.
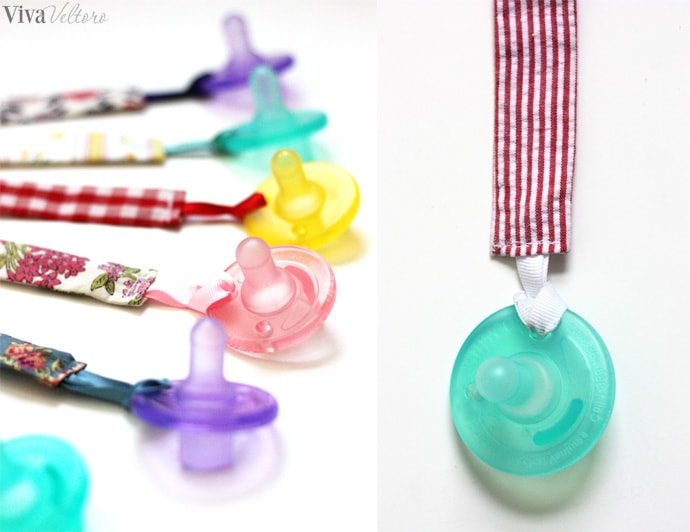
Slide the knot into the other open end of your fabric tube and seal the end shut with a basic straight stitch. Back-stitch a few times to secure it, then string your pacifier through like a luggage tag.
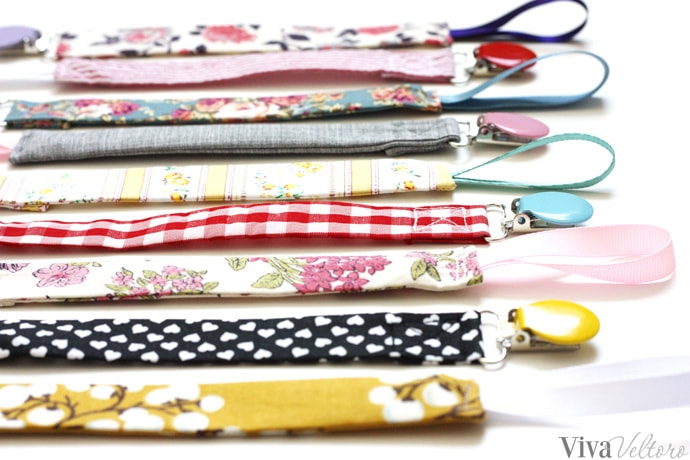
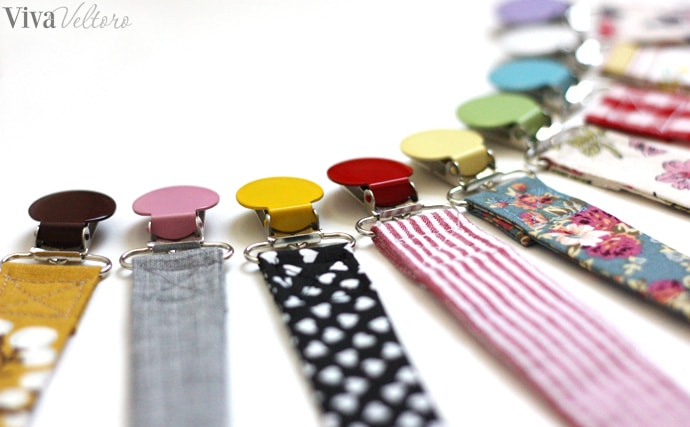
Aren't these fun!? You can find these colored clips on Amazon, Etsy, and eBay if you search for "enamel suspender clips" and it's not hard to find them for less than a dollar a piece.
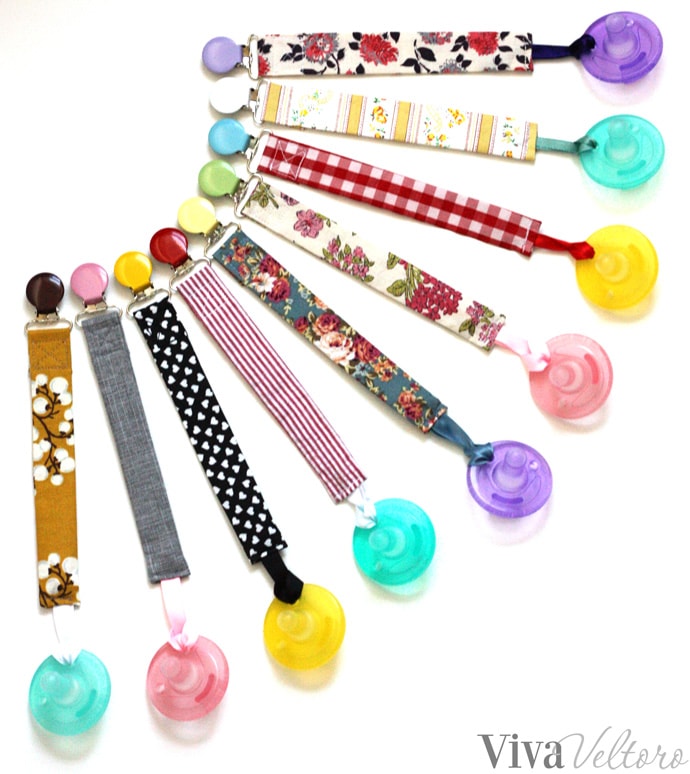
The biggest advantage of putting those cute little pacifiers on a cute little clip is that they don't fall to the ground and roll around on the dirty floor every time the baby opens their mouth to say something. I've loved having a number of these to choose from and making them an added accessory to baby's outfit!
Have fun making up a batch of these for your own little sweetie pie! These make excellent gifts too!!
Don't forget the pacifiers! We love Soothie brand and they work perfectly with these clips. They come in green, blue, pink and purple.
If you're looking for other great sewing tutorials, we've got you covered! Check out our popular sewing projects: sew a circle skirt for babies, how to make pacifier clips, DIY flat iron holder, how to make a tooth fairy pillow, how to make sweater pillows, and how to make hanging kitchen towels and others!
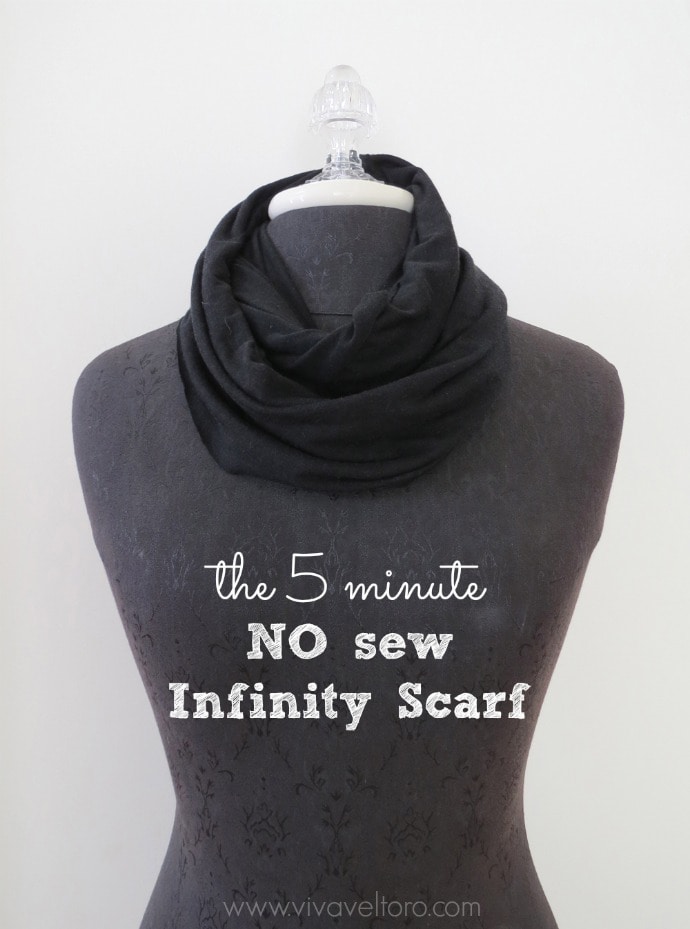
DIY 5-Minute No Sew Infinity Scarf
Disclosure: Amazon links are affiliate links.
Amber Ludwig says
Oooh totally pinning this for later!! These are so super cute and so easy!! Im not a sewer but this seems like a great first project!!
Camille says
Yes, Amber, this is a great first project!! Minimal sewing. I'd love to see what you make!
Lash Factory says
Awesome article. DIY is perfect, you can choose your materials and other things you want to add.
Rebecca k says
These are great! Thank you for the tutorial!
Allison Arisman says
These are so cute, thanks for the great tutorial.
Brittany from malaysia says
Wow !!! So cute and easy to make. Thanks for the great tutorial
Kay says
I ilke this idea for our Fall Bazaar at our church. Where do I find the cute clips?
Ruth V. says
Hi Kay! I've linked to them on Amazon above.
matilda says
They're very pretty, but if youa re in the UK, do be aware that you need CE testing before selling them. They are considered a choking hazard without statutory safety testing here.