• Skip to primary navigation
  • Skip to main content
  • Skip to primary sidebar
  • Home
  • About Me
    • WORK WITH US
  • Shop
  • Nav Widget Area

    • Facebook
    • Instagram
    • Pinterest
    • Twitter
    • YouTube

Viva Veltoro logo

  • LIFESTYLE
    • Beauty and Fashion
    • Reviews
  • Tieks
  • Recipes
    • Soup
    • Appetizer
    • Breakfast
    • Brunch
    • Dessert
    • Dinner
    • Drink
    • Snack
  • Travel
  • Wellness
menu icon
go to homepage
search icon
Homepage link
  • Home
  • About Me
  • Shop
  • Beauty and Fashion
  • Reviews
  • Tieks
  • Recipes
  • Travel
  • Wellness
  • Connect With Me

    • Facebook
    • Instagram
    • LinkedIn
    • Pinterest
    • Twitter
    • YouTube
  • ×

    Home » Makeup Brush or Paint Brush Roll-Up Tutorial #DIY

    August 17, 2014 By Camille 3 Comments

    Makeup Brush or Paint Brush Roll-Up Tutorial #DIY

    This post may contain affiliate links. Click here for more information.

    paint brush roll-up

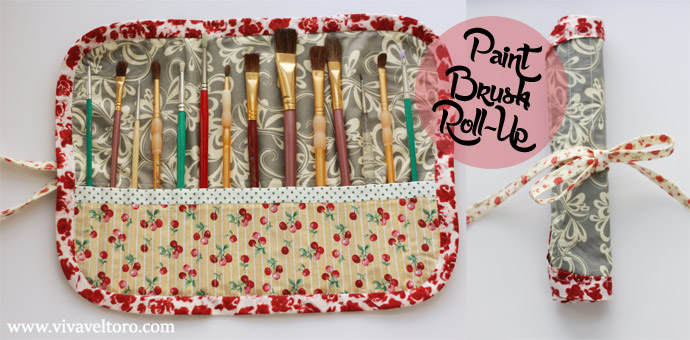
    I love to paint! Do you remember the egg shell garden and wooden pennant banner? There are oh so many more painting projects coming up here on Viva Veltoro! Just wait until I show you some painted peg dolls and my kitchen table! After several years of painting projects, I have a handful of brushes and no good way of storing them. I've been keeping them in a Pringles can since I left home. This week I decided a paint brush roll-up would be just the ticket.

    paint brush roll-up

    The first step is to round up a bunch of scraps. The length and width of your final product will depend on the height of your brushes, and how much you will be storing. My base (the gray swirl fabric) came out to be 10" by 13" with the pocket (the yellow stripe cherry print) at 4.25" by 13".

    paint brush roll-up

    Above you'll see the dimension of the other strips. Feel free to change these up if you want thicker bands anywhere. Note that since the red and white floral is going to go around corners, it must be cut on the bias!! This will allow it to stretch around the corners nicely since a bias cut has a lot of stretch.

    Ok, below you'll see my favorite way to finish an edge. Follow these directions to get a clean, enclosed finish with a cute contrast trim.

    paint brush roll-up

    Now sew the pocket directly on to your base around the perimeter.

    paint brush roll-up

    Next, you're going to sew lines up your pocket to create the spaces for your brushes. Choosing a fabric with lines in the design made this extremely easy. I totally suggest using a stripe for this portion of your roll-up. If not, you might consider marking straight lines with a disappearing ink pen. Again, the width depends on your brushes--whether you're making this for paint brushes, makeup brushes, crochet hooks, or other supplies. I made a few of varying widths to allow for larger brushes.

    paint brush roll-up

    Last comes the tricky part. You're going to wrap this bias-cut strip all around the circumference as you sew. Don't stretch it around the corners. Rather, gently push as much extra fabric as you can into those curves without creating a crease. When the two ends meet, sew them together on a diagonal and cut off the extra. Gently fold your strip around to the back and iron as you go to make it crisp from the front.

    paint brush roll-up

    On the back side, fold under the edge and iron it down, wide enough to be caught by the "stitch in the ditch" stitching you'll do from the front.

    paint brush roll-up

    The finishing touch is the tie. I tucked the two ends into the bias tape before passing over it in the machine, which stapled it down fine. Backstitch to be safe.

    paint brush roll-up

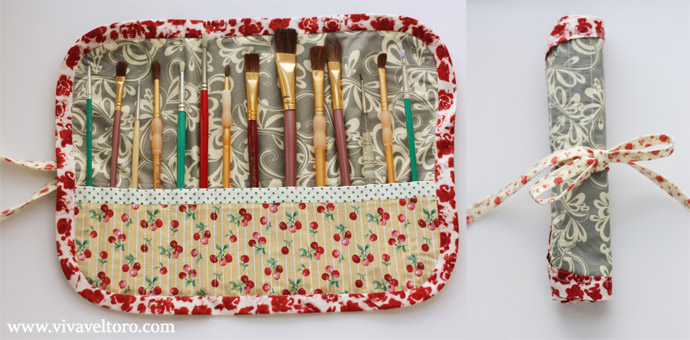
    Done! This really is a quick job, especially if you want to purchase pre-made bias tape and not bother making you're own.

    paint brush roll-up

    Use it to hold paint brushes, makeup brushes, crochet needs, pens, colored pencils, or any other supplies! What a cute bundle to tote around!

    Pin455
    Share31
    Tweet
    Reddit
    Yum
    486 Shares
    « Looking for a GPS running watch? Check out the Garmin Forerunner 15!
    All NEW items from Babyville Boutique! »

    Reader Interactions

    Comments

    1. Cami says

      August 18, 2014 at 12:37 pm

      This is such an awesome tutorial! I hate when my expensive brushes get crushed!

      Reply
    2. Cami says

      August 18, 2014 at 12:37 pm

      This is such an awesome tutorial! I hate when my expensive brushes get crushed!

      Reply
    3. MaryAnn says

      March 02, 2015 at 8:20 pm

      This would make a great case for crochet hooks! Thank you!

      Reply

    Leave a Reply Cancel reply

    Your email address will not be published. Required fields are marked *

    Recipe Rating


    This site uses Akismet to reduce spam. Learn how your comment data is processed.

    Primary Sidebar

    Hi! I'm Ruth! I'm so glad you found me. On Viva Veltoro you'll find a little bit of everything, including fashion, beauty, parenting, recipes, DIY, products I love and places I love to go.

    Feel free to contact me at [email protected]

    More about me →

    • Facebook
    • Instagram
    • Pinterest
    • Twitter
    • YouTube

    Brunch Recipes

    • Lemon Ricotta Stuffed French Toast Recipe!
    • Italian Pasta Salad With Pepperoni Recipe
    • Cherry, Dragon Fruit and Berry Smoothie Bowl Recipe
    • Banana, Lime, and Mango Smoothie Bowl Recipe

    Footer

    ↑ back to top

    ABOUT VIVA VELTORO

    Viva Veltoro is a lifestyle blog, created by Florida blogger Ruth V. We focus on family, parenting, food, travel, DIY, and entertainment. Read more about the team behind the blog on our About Me page.

    Disclosure
    Cookies Info
    Privacy Policy

    COPYRIGHT

    © Ruth V. and Viva Veltoro, 2022

    We are a participant in the Amazon Services LLC Associates Program, an affiliate advertising program designed to provide a means for us to earn fees by linking to Amazon. com and affiliated sites. You can find our PR Policy and Disclosures HERE.