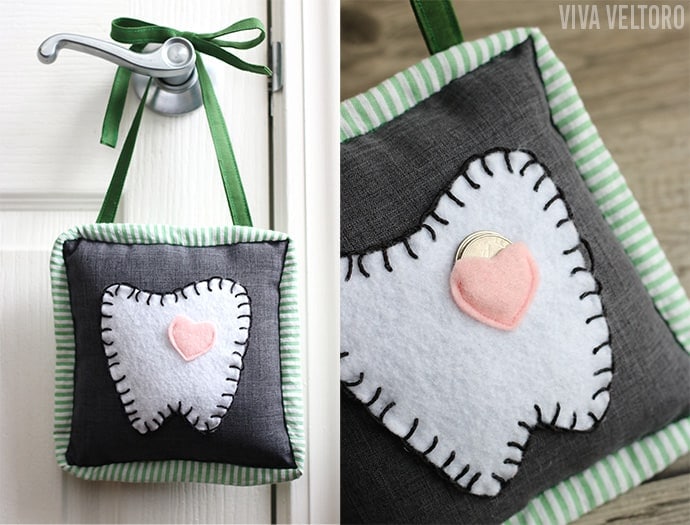
DIY Tooth Fairy Pillow Tutorial
My oldest child up and lost his first tooth the other day and I was a little unprepared! "Uhh...just put your tooth under your pillow and let's hope it doesn't get lost?" I thought surely I could make something that held that little tooth and also acted as a pocket for the coins left in its place. This Tooth Fairy Pillow tutorial is simple and almost too cute to only pull out a few times in their childhood!
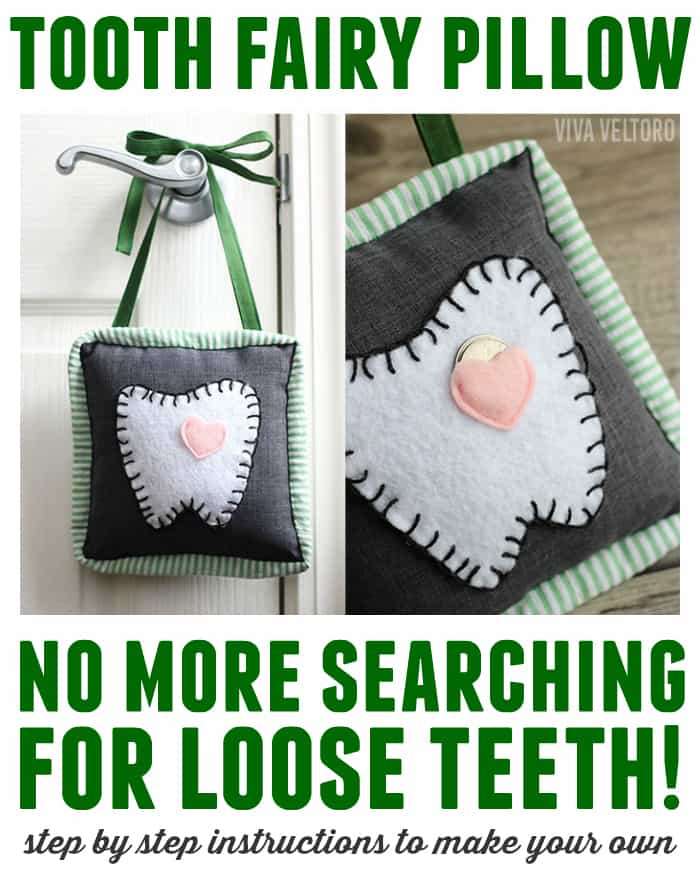
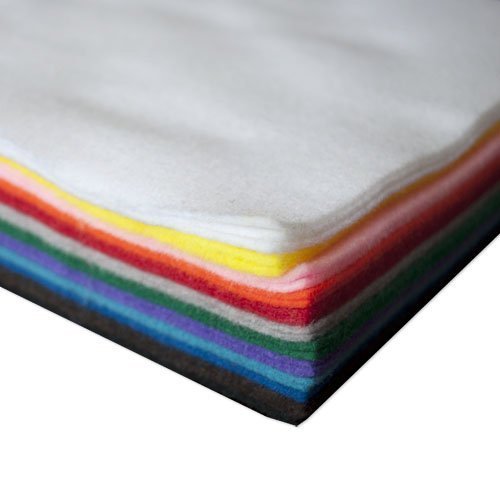
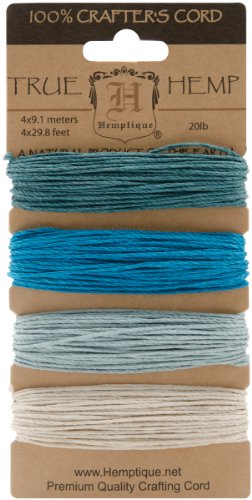
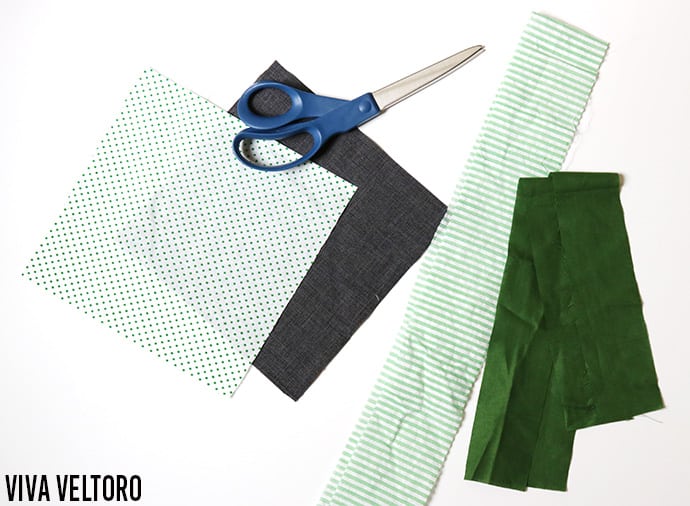
I wanted to make a Tooth Fairy Pillow that had a small pocket for a tooth, which could also hold a few coins. This is also a great project for using up your scrap pile! Gather a few coordinating fabric scraps, a handful of batting, one sheet of white felt, a tiny piece of pink felt, and some thread!
Here are a few products you might find useful for this project:
25 Sheet Assorted Acrylic Craft Felt Warm & Natural Cotton BattingHemptique Hemp Cord Card

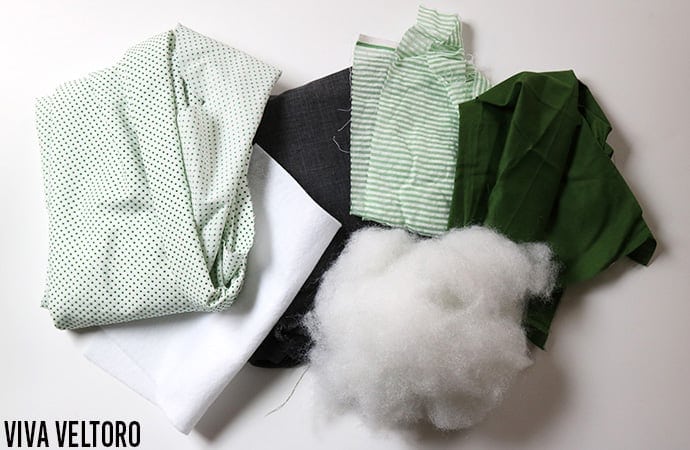
Cut your fabric to these measurements:
- Two squares of fabric 7.5" by 7.5"
- A long strip of fabric for the border (I used the green stripe): 2 ¼" wide and at least 30 inches long
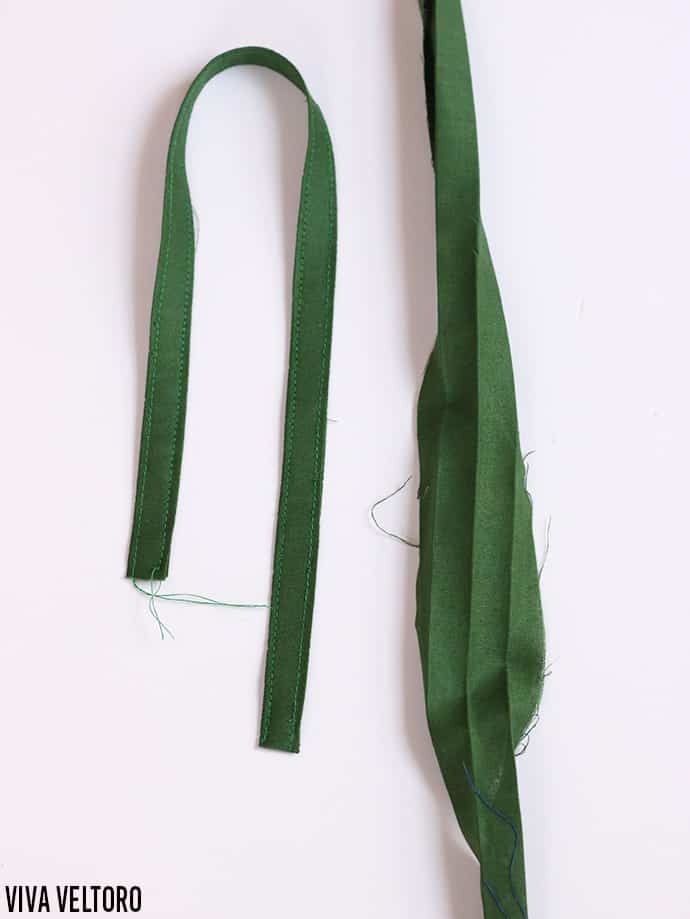
- Two long strips of fabric for the ties (I used the dark solid green): 2" wide and at least 30 inches long
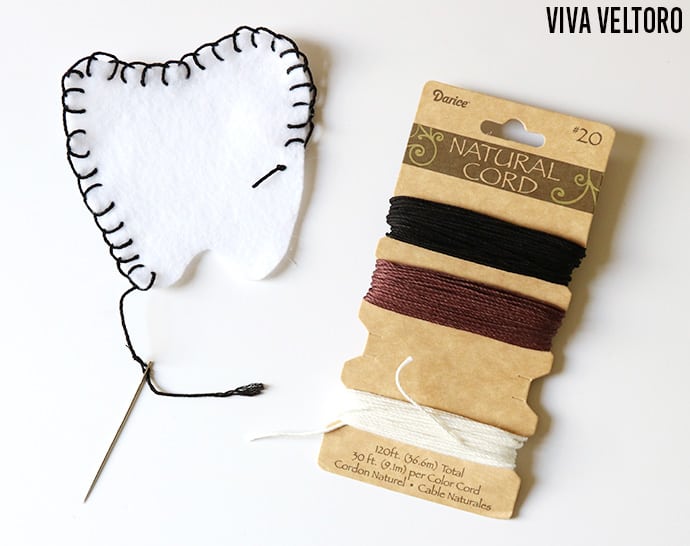
Print out this tooth pattern, cut it out, and trace its shape onto the white felt.

I used black cord to sew a blanket stitch around the edges, but you can skip this step if you'd like. It's purely decorative.
First, sew the tiny pink heart of felt on the white tooth with your machine (like I did) or by hand, but only the bottom half so you can put a little tooth inside! Then, sew down the white felt tooth onto your fabric square.
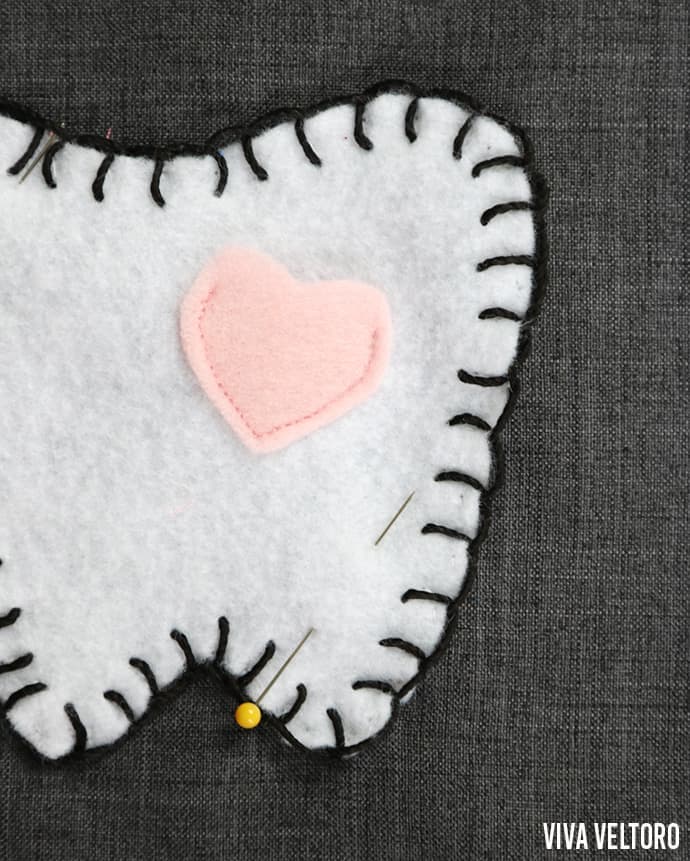
You can do this by hand or machine, but I chose to hand-stitch so I could hide the stitches underneath the black cord.
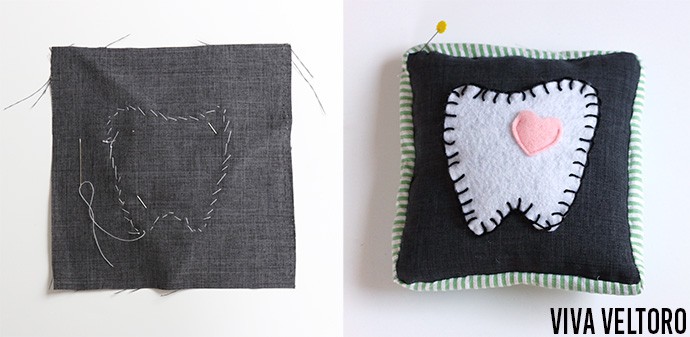
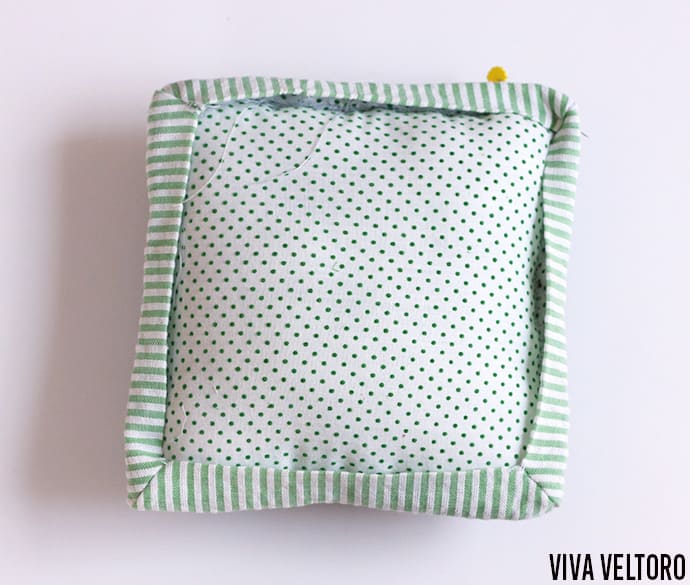
Ok, take your two square pieces and with the right sides together, sew it around the four edges, leaving a few inches so that you can turn it right side out. Fill it with enough cotton stuffing to make it firm. Now take the border strip (I used this green stripe) and sew it to the edges with a ½" seam allowance. Miter the corners and flip it over to the back so it will look like this:
Iron the green strips in half, and then fold over the edge in half again to create a strip with the edges enclosed. Top-stitch down both sides.
Pin them down at the top of the pillow and "stitch in the ditch" from the top of the pillow, which will enclose the border...
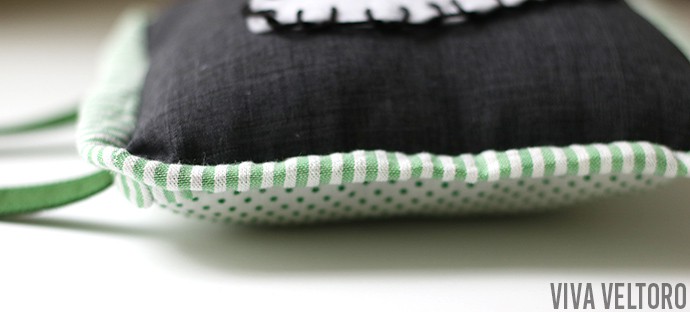
...and the back will look something like this:
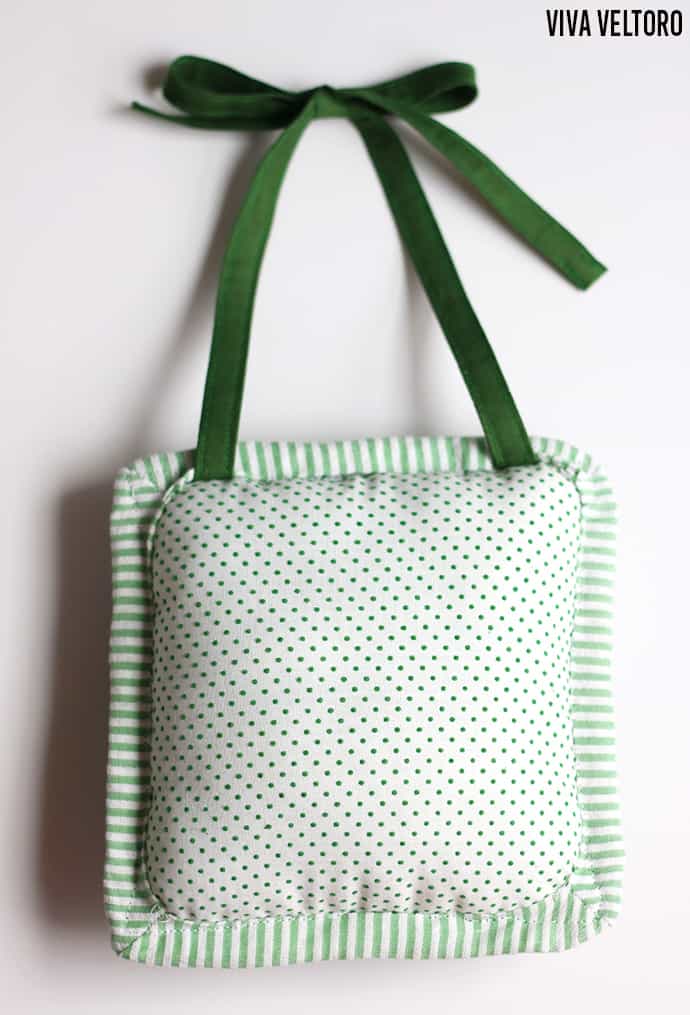
You're done! I like the idea of hanging the tooth fairy pillow on the doorknob at night so I don't have to sneak in and hunt for a baby tooth in the dark and risk the chance of getting caught!
Have fun, and feel free to tweak the method to make it work for you and what you have on hand! Enjoy making a tooth fairy pillow for your kids and tell us how it goes!
If you liked this post, check out our other crafts and DIYs
Amber Ludwig says
Oh my!! This is just adorable!! I love it!! I love not having to dig around for a tooth and I love the small pocket for a treat. I keep hearing of people giving ridiculously large gifts for kiddos losing teeth!! Its craziness!! This makes sure everything stays small and reasonable 🙂
Camille says
Right?! Mama can't afford something outrageous for every tooth! That IS crazy.
Mia says
This is so very precious. What a good way to make the moment extra special.
Rosie says
oh wow this is just so adorable I'd love to make it!
Lori W. says
Would love to make for my boys. so cute!
Sandra Caballero says
I really love this idea for my daughter.
Lisa Garland says
I am actually going to try to make this for my granddaughter when she starts losing teeth. Love it, so cute!!
G K says
This is so cute! I almost wish I had teeth to lose. lol
Carol ONeil says
This is Adorable!
jennifer Michelle Ora Kreisler says
I made a tooth fairy alien critter for my son. I used hot glue because I didn't have the time to sew it. But felt does hot glue nicely. This pillow is actually easier I must say-- because having it hang on the door is easier than risking waking up a child who is snuggling with a pillow friend. This looks professionally done! Good Job!
ellen beck says
I like this. I looks easy since it is made with felt and the sewing could be done by hand or machine. You could also get really creative with it. Neat little project.