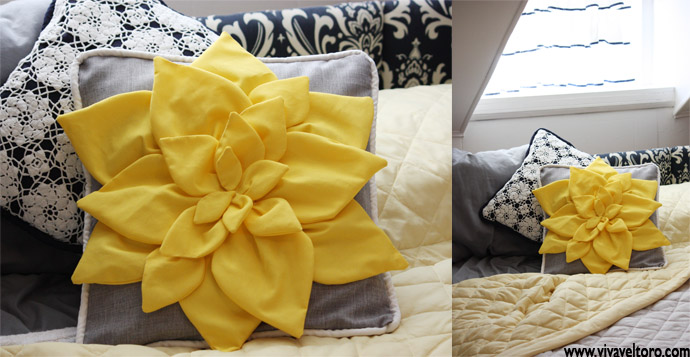
I think one of the fastest ways to spruce up a room is with a bright floral pillow! This DIY Flower Pillow Tutorial project takes minimal material and can be made in no time at all.
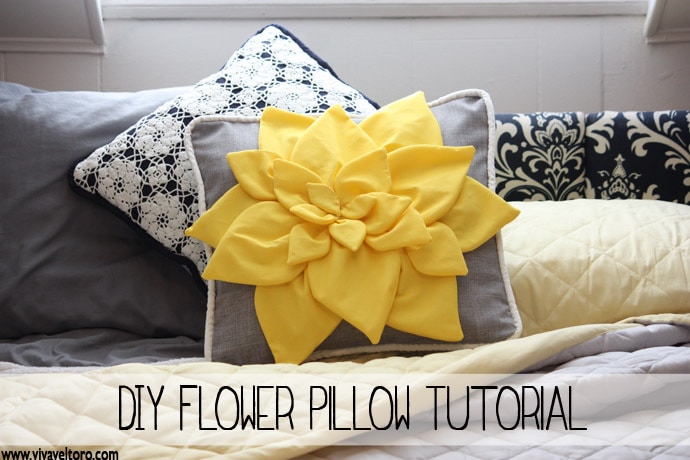
Looking to add a pop of color to your room? Just think of all the options with this flower pillow. The possibilities are endless! Here's how to make one of your own.
DIY Flower Pillow Tutorial
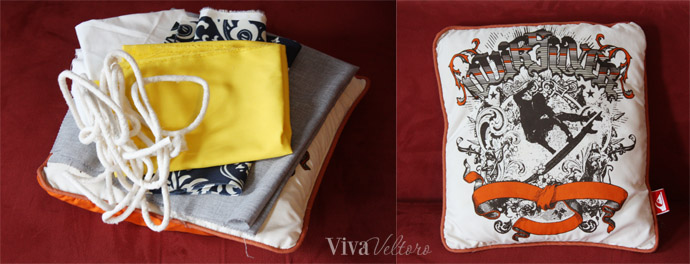
For materials, you'll first need a pillow. You can purchase pillow forms at most craft stores, or if you're brave enough, you can hit up your local thrift store (you can read in my bio how I am a huge thrifter!) and pick up some pre-owned pillows for a couple bucks. Mine, above on the right, is just so cute, I didn't know how I'd have the heart to cover it! Just kidding. $2 was a fair price for this gem.
You'll need two squares of fabric large enough to cover the front and back of your pillow. For the flower petals, a half yard should be fine, and you can make a rough estimate of the circumference of your pillow for cording.
Materials:
fabric to cover front and back (½ yard)
fabric for flower petals (½ yard)
cording or piping (circumference of your pillow)
contrast fabric scrap for your piping
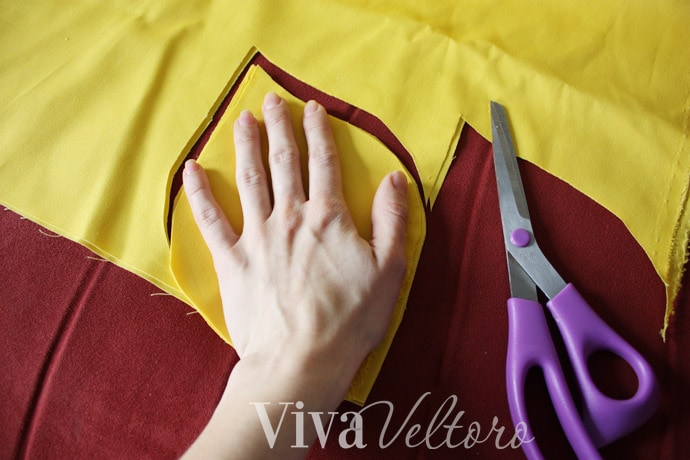
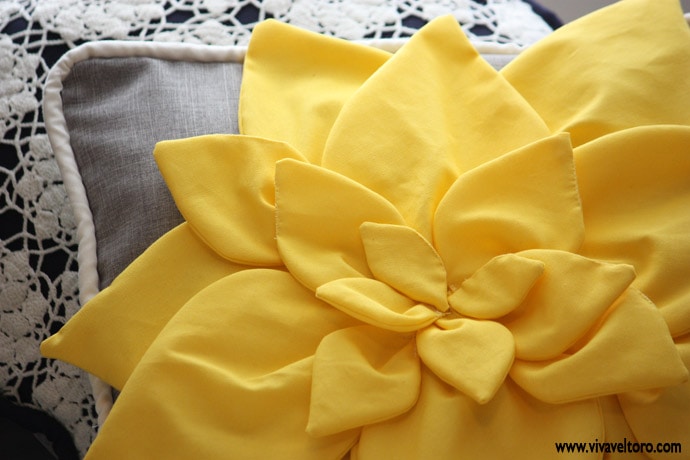
To create your petals, start cutting out these rounded and pointed shapes from folded fabric, about the size of your hand. You'll need a top and a bottom to match. If you cut them out right next to each other and on a diagonal, you can really cut down on your waste. You can see how you can even cut out the next row above this in the leftover wedge shapes to eliminate even more fabric waste.
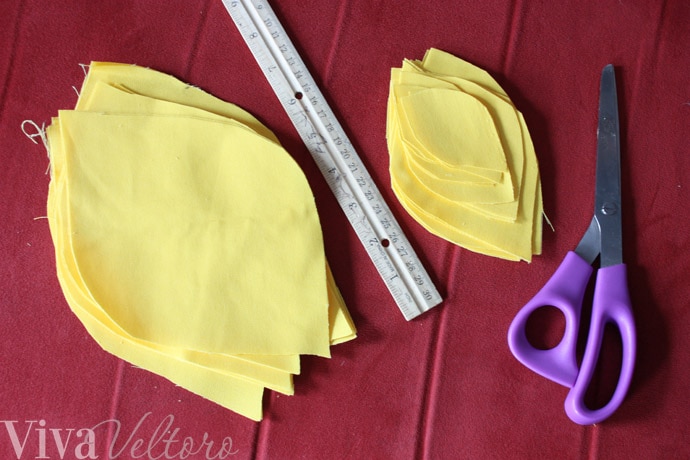
Don't worry about these being identical. Here I have 10 large petal pairs, and 11 pairs of smaller petals that decrease in size slightly. You can see on the ruler that the larger ones came out to be around 9" tall from top to bottom, and the smaller ones 6" or less.
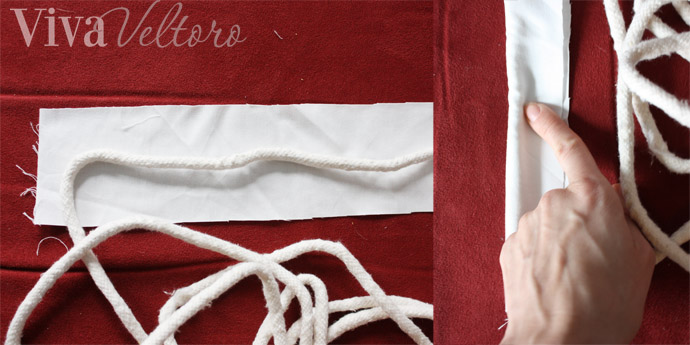
For your piping, cut a long strip of fabric wide enough to roll around the cording. My strips here are 3", wide enough to roll around my thick cord. You'll want to sew closely along your cord where my finger is above all along the length of your strip. Your piping is done!
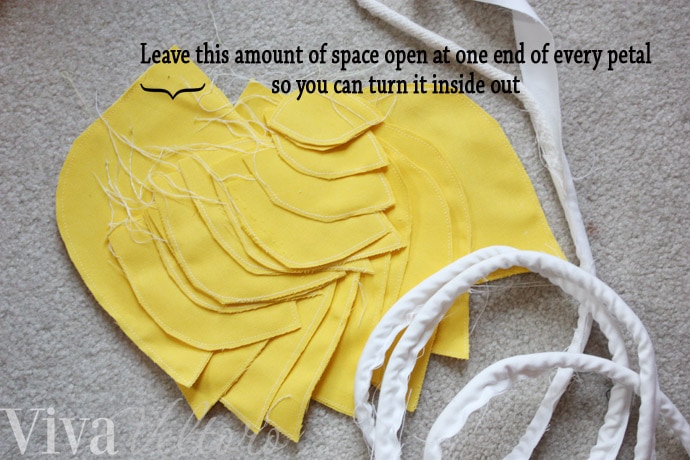
Now sew along the perimeter of every petal. You can sew right up to the edge, or you can give yourself some error room and trim it down later. Leave atleast a 1" gap at the end of every petal so that you can turn it inside out. Put on a good movie and start turning!
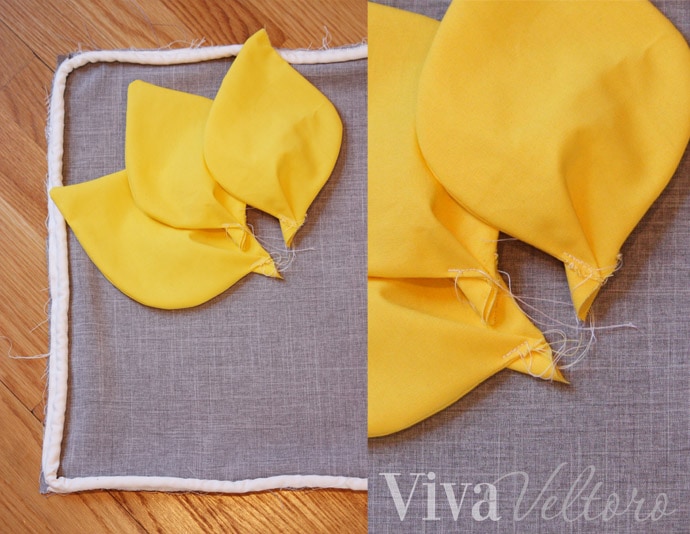
Trim your piping to leave roughly a ½" of extra fabric beyond where you sewed. Sew the piping around the perimeter of your top fabric square, making a clip in the piping when you reach a corner, allowing it to spread and turn nicely. When you have all your petals turned under, pinch them closed at the baste, fold to one side, and tack down to create a little dimension. Start arranging your petals how you'd like, then pin and sew, either by machine or hand, just where you'd like them to go. You can create a very full, tightly-spaced bloom, or something more loose, casual, and soft.
When all your petals are sewn onto your top piece (the gray square), with right sides together, sandwhich your petals and sew the back square on by going around the four sides. Then you're done!
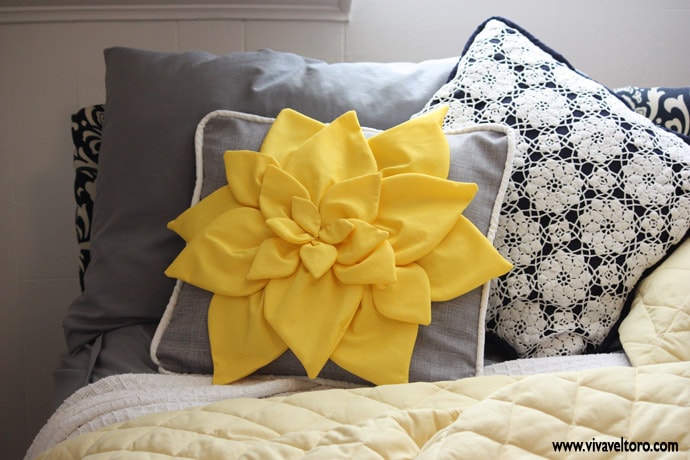
I love how a single pillow can really boost the happiness in the room!
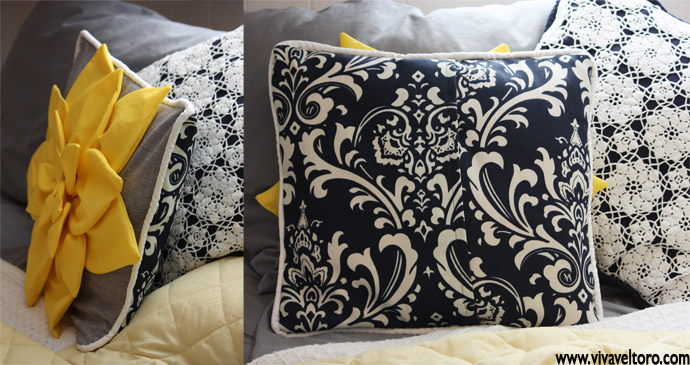
For the back, I made two pieces that overlap so that the pillow could be inserted without having to mess with hand-stiching anything shut, or sewing in a zipper. I also tacked down the ends of the outside petals to the gray square with a single loop of thread because they were starting to look a little droopy and floppy. I don't think you'd have this problem if you used felt, which is much lighter.
Disclosure: Amazon links are affiliate links and contribute to the cost of maintaining this website. Thanks!
If you liked this post, be sure to check out our other DIY tutorials!
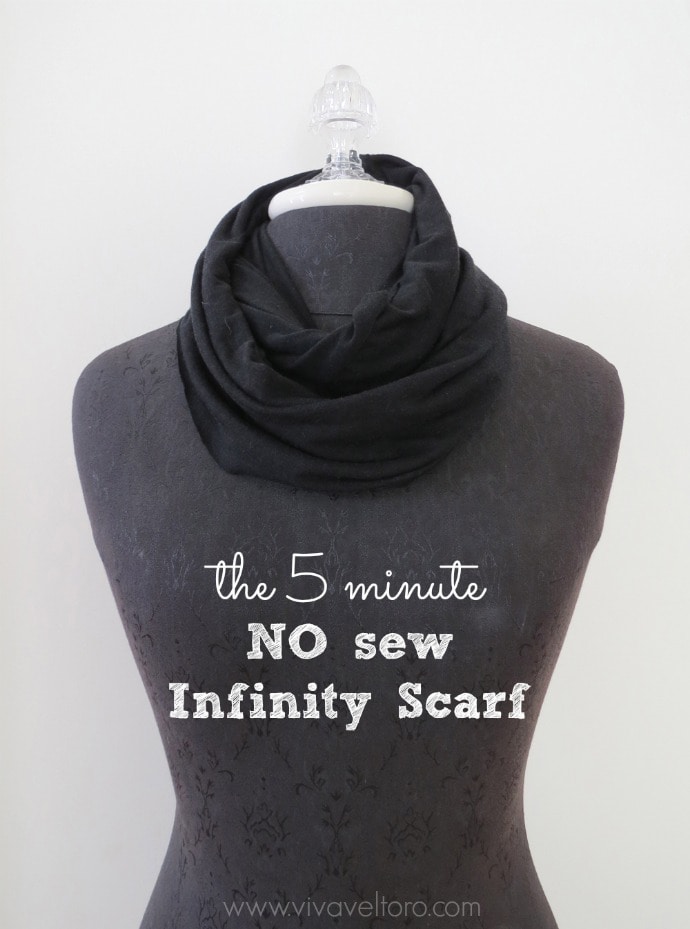
DIY 5-Minute No Sew Infinity Scarf

nicole dz says
WOW! Looks like something you would buy at a store! Like how you turned something old and not so pretty in a real gem! Amazing DIY craft! Looks great! My mom would love this.
Julie Wood says
This is so pretty. To take a plain pillow and decorate it with pretty yellow flowers is awesome. You did a great job! I want to do this and make some decorative pillows. Thanks for the inspiration. I can get some pillows at the thrift store!
Camille says
Thanks so much! Do it!! I'd love to see what you make!
Christina Easter says
This is such a cute idea! I need to make some for my daughter's reading nook in her room!
Cathy Jarolin says
I Love your Beautiful Yellow Flower Pillow. Thank you for giving us the complete directions on how to make them. I will be making an attempt to make one in the near future~ :O)~~