I'd heard of silk dyed eggs before, but it wasn't until this year that I felt brave enough to try them out. They are so easy to make, and we will definitely be trying them out again next year when I have time to procure more silk ties! Check out how we made them and what we'd do differently next time.
Silk Dyed Eggs
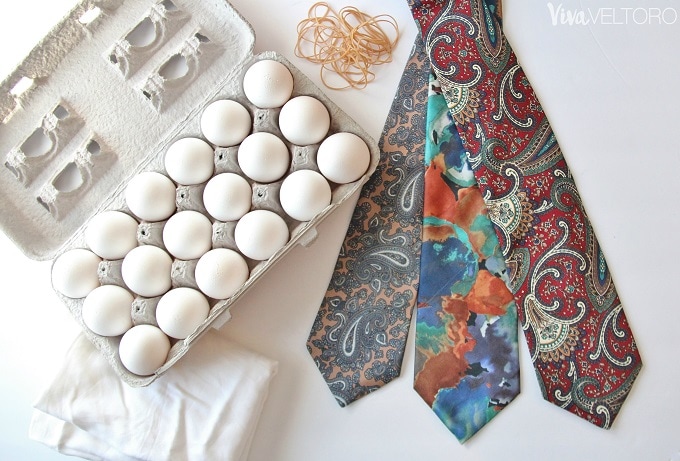
Right off the bat, I have to say that I was very happy with how our silk dyed eggs turned out-I think the designs transferred beautifully! That being said, I started out with four ties that were supposedly "all silk" but only two of the designs actually transferred - so make sure you get REAL, 100% silk ties, scarves, or material for this project. Here's everything you'll need:
*Eggs (unboiled)
*100% silk ties, fabric, or scarves, cut into pieces large enough to wrap around an egg
*Rubber bands
*An old white pillowcase (or piece of fabric) cut into pieces to wrap around the eggs over the silk
*White vinegar
How to Make Silk Dyed Eggs
First, you'll want to find your silk fabric. I went to our local thrift store to buy ties, but you can also use fabric or scarves like these gorgeous ones from Amazon. While I had a lot of fun picking the silk ties at our thrift shop, I was disappointed when only two of the patterns transferred onto the eggs. Plus, I ended up paying about $16 for the ties I chose, and I could have gotten a gorgeous scarf for cheaper. The one benefit of the ties is the variety of patterns. The more garish the tie, the prettier the print on the egg!

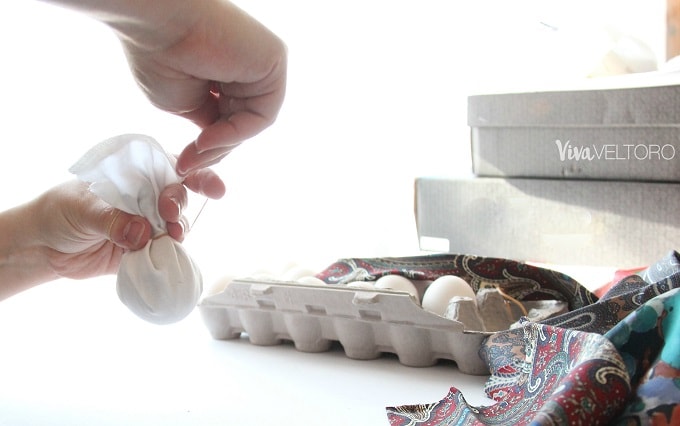
Start by cutting apart the tie (I used a seam ripper and scissors) and then cut the larger end into squares that will wrap around your egg. I did three eggs per scarf, but you can also reuse the silk pieces if you'd like. The pattern will just be more muted each time you reuse a piece.
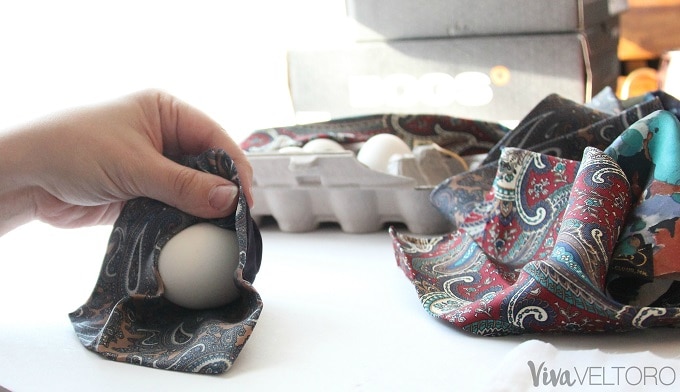
Wrap your fabric around the egg, making sure to wrap it tightly and with as few creases as possible. The creases will show up as streaky marks on your egg once they're finished, and you're bound to have some. But, the pattern and colors will transfer best if the fabric is pressed directly against the egg. Tightly secure the fabric with a rubber band.
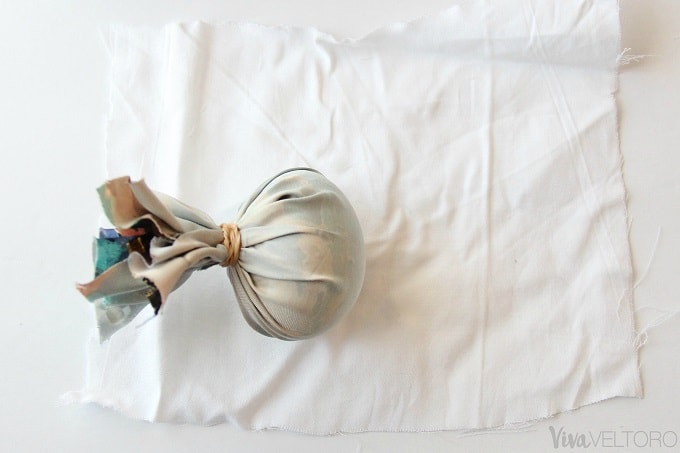
Then, wrap the egg in a piece of white fabric. I used an old white pillowcase that had seen better days. The white fabric prevents the dyes from transferring onto other eggs during boiling.
Secure the white fabric with a rubber band also, and place all of the eggs into a pot. Fill the pot with water about two inches above the eggs and make sure they're all sitting on the bottom.
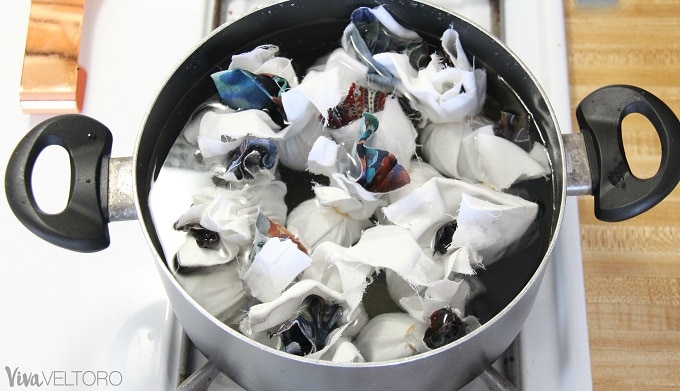
Place the pot on the stove on high heat, and add ¼ cup of white vinegar. The vinegar helps the dyes adhere to the egg shells.
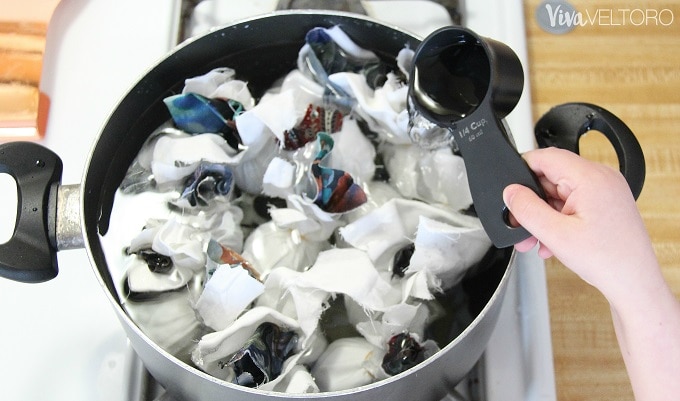
Bring the eggs to a boil and let them boil for 20 minutes. After 20 minutes, remove them from the heat and use a tongs to take the eggs out. I placed mine in a Pyrex baking dish, but just make sure you don't place them on a surface where the dye could take hold. You could place them on a layer of paper towels, also.
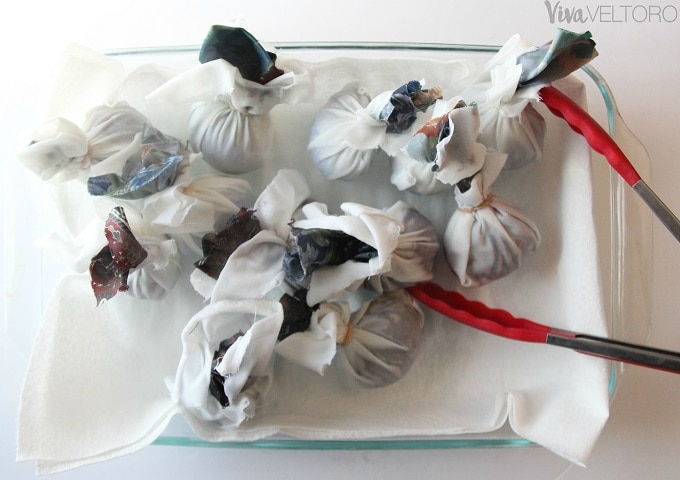
Now for the hard part - patiently waiting for the eggs to cool! You'll want to let them come to room temperature and make sure the dye has had time to set in. Then it's time for the big reveal! I was disappointed when half of our eggs had NO transfer at all, so again, make sure you're using 100% silk before you go through all the work!
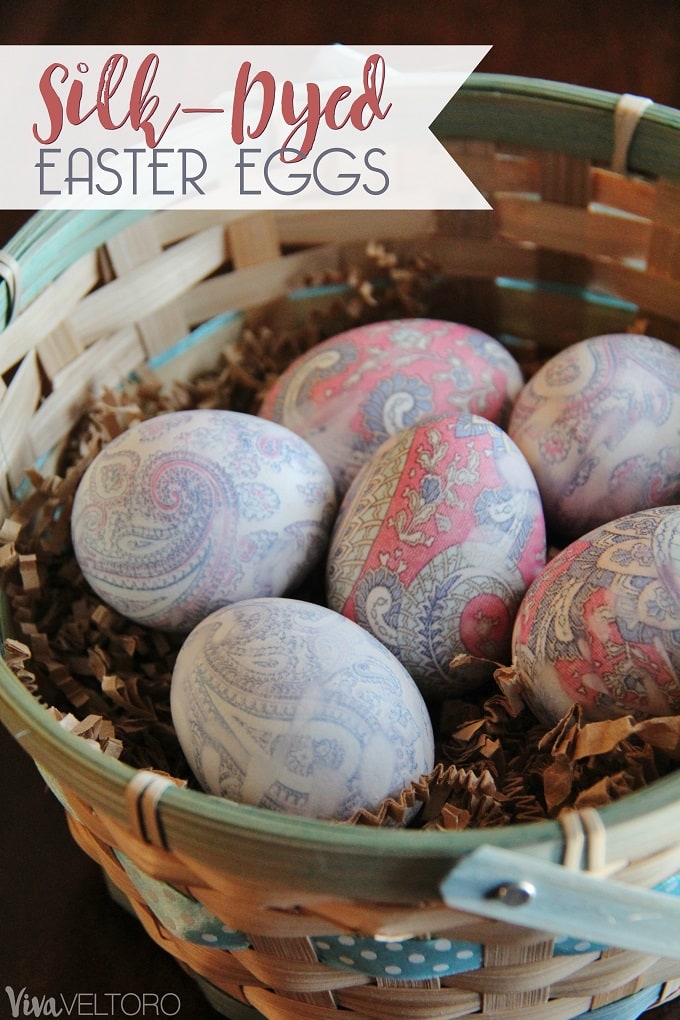
Silk Dyed Eggs - The Final Result
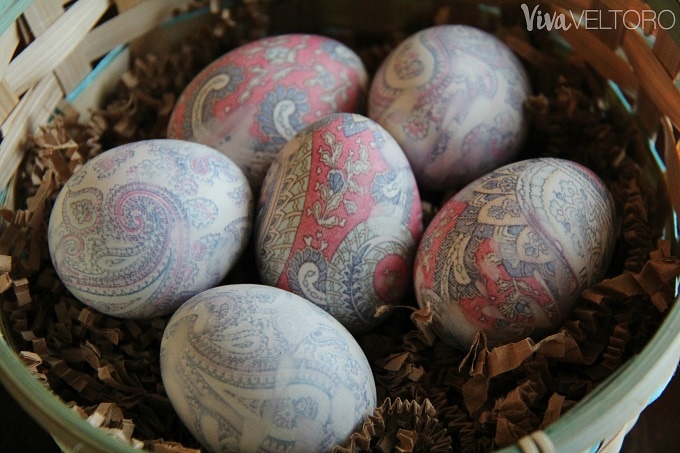
I think the two ties that did transfer turned out beautiful, though I was surprised at the colors that came through!
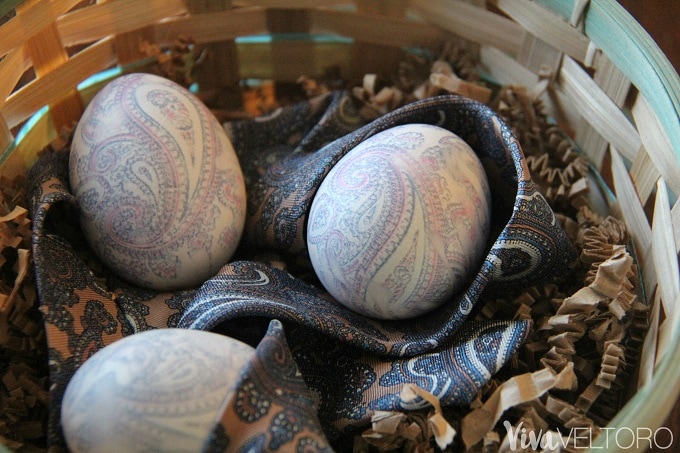
The first tie I used was brown and blue paisley, but none of the brown came through on the eggs. Instead, a soft blue and muted pink came through for the paisley prints and I think they're so pretty!
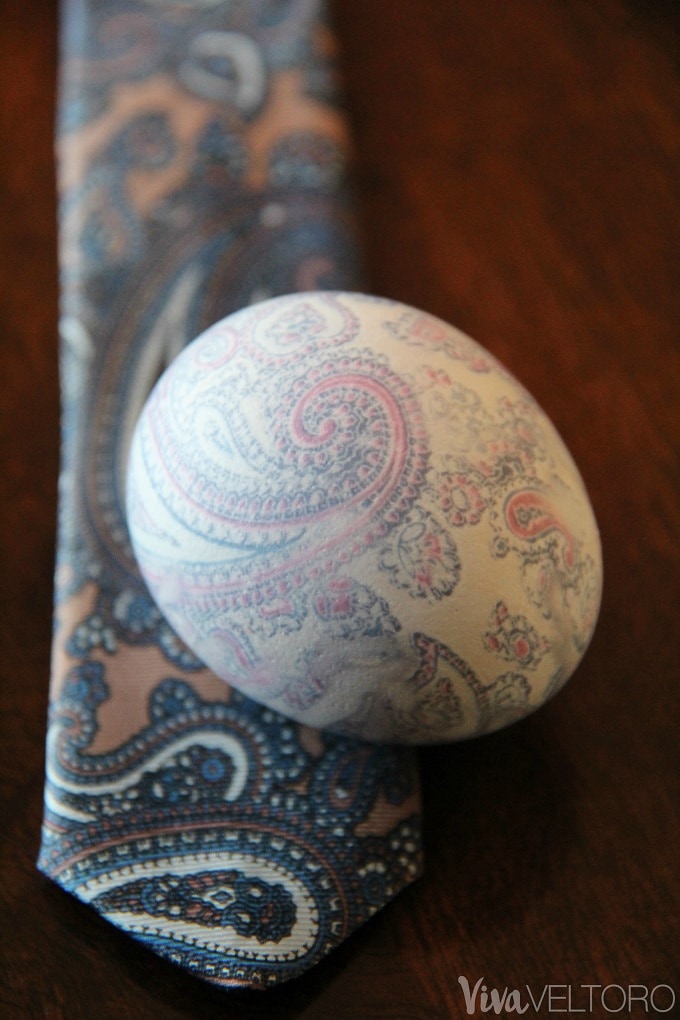
You can see a few places where the fabric was folded and there is almost a smear of color, but I don't mind that. I still love that the design came out so clearly on the eggs!
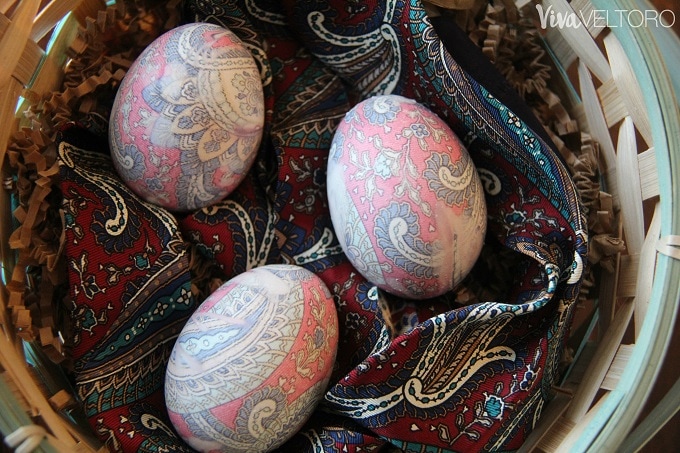
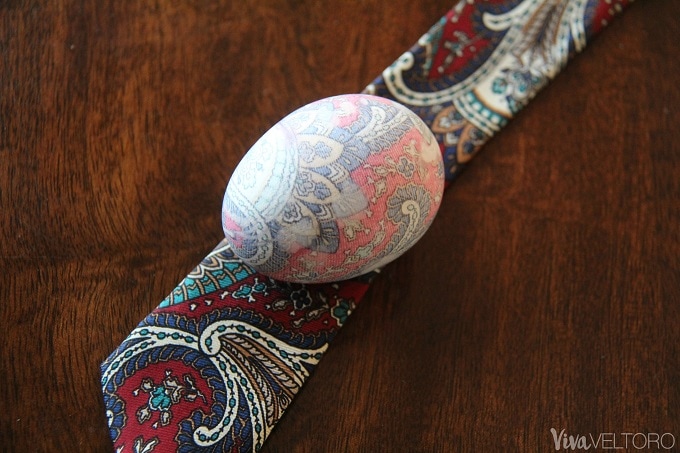
The second tie was a rich red color with teal and blue paisley prints and flowers. In my opinion, a hideous tie, but I LOVE how it came through on the eggs. I tried to get a couple different designs on the eggs since the print was so vibrant.
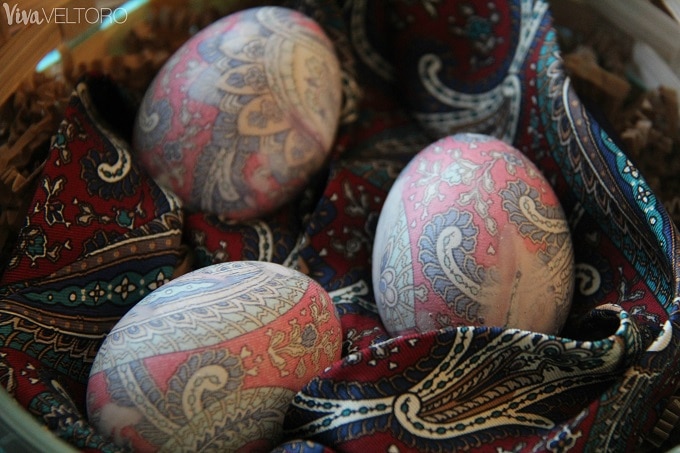
This design is my favorite, and the colors came through so beautifully! I love that you can actually see the lines from the ties, also-it gives the eggs a texture they didn't have to begin with.
I'm super happy with how the two ties transformed these eggs, and I'm excited to make them again next year! My plan is to search for silk ties at garage sales this summer since they'll be so much cheaper than even the thrift store. That way it won't be such a bummer if some of them don't transfer! Also, I feel like I should include a disclaimer that you shouldn't eat these eggs, because of the chemicals used in making the silk ties. I hope you give this a try though, and I'd love to see your results!
Have you tried making silk dyed eggs for Easter?
If not, will you give it a try now? Let me know what you think below!
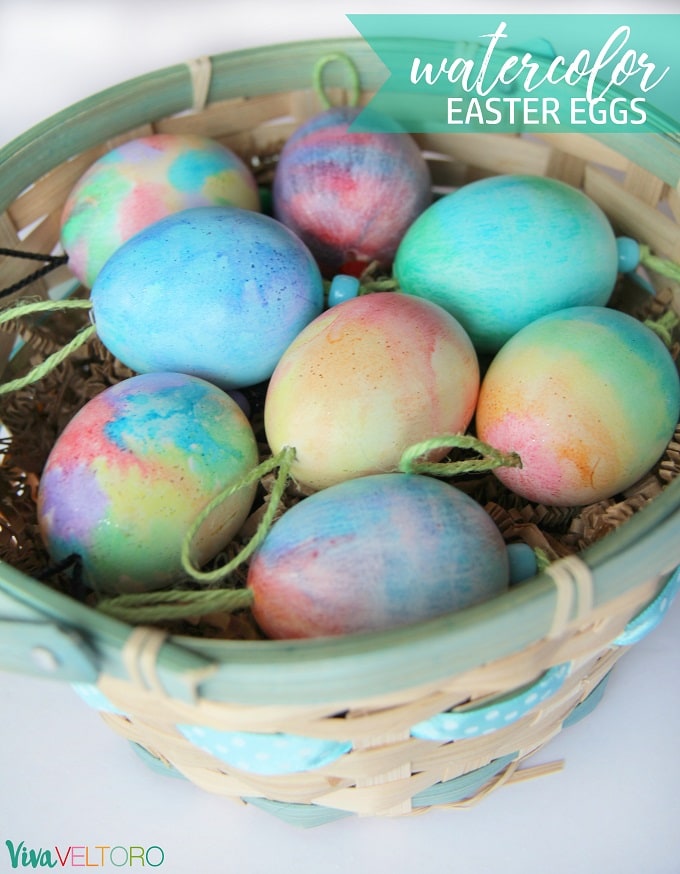
Check out our other Easter egg posts for more inspiration:
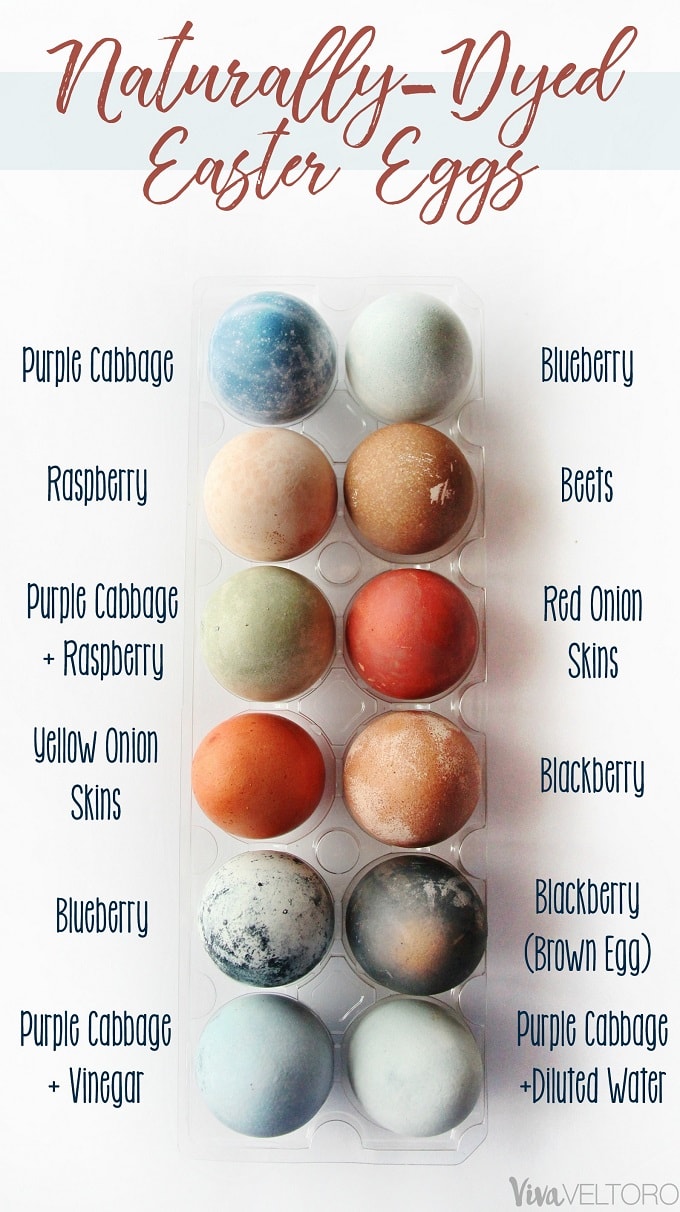
Natural Easter Egg Dyes from Common Fruits and Veggies
Lauralee Hensley says
I like your silk eggs. I've never heard of this before. Thank You for the pretty share.
Heather Eavers says
The eggs died with a neck tie are really neat looking. We don't have any ties here, but I'll start looking at thrift stores for next Easter!
Christina H says
I wish I saw this in time for Easter, but I'll save it for next year! These are so pretty!