This year we've been trying out some different ways to color eggs for Easter. I checked out Pinterest for some inspiration and was blown away by all the options! Who knew you could color eggs in so many ways aside from the typical dissolving dye tablets!? Not me! This week we decided to try making our own natural Easter egg dye from fruits and veggies, and we love the results! Check out how we made them below.
Natural Easter Egg Dye
I thought it would be fun to try making our own natural Easter egg dye with fruits and veggies. I love the gorgeous muted colors I've seen from natural dyes. Not that the bright colors aren't super fun; I love those as well! But the natural colors are some of my favorites. If you're trying to avoid food dyes, natural dyes are a great alternative option.
How to Make Natural Easter Egg Dye
This is a fairly time consuming project, so we started early on Sunday morning and our project lasted the whole day! Here's what you'll need:
- Hard-boiled white eggs (we tried brown eggs also, but the colors did not really "stick" to the brown eggs, besides blackberry-I personally wouldn't try this with brown eggs again)
- Vinegar
- Various fruits and vegetables
- Cheesecloth or Mesh Strainer
- Containers to hold dyes (I used glass mason jars but these would also work great)
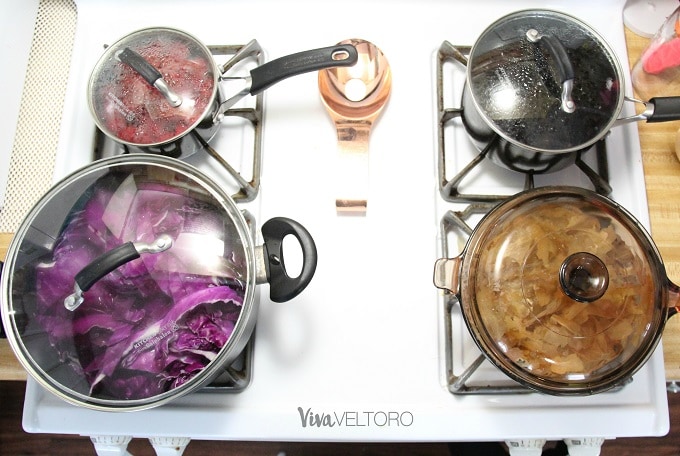
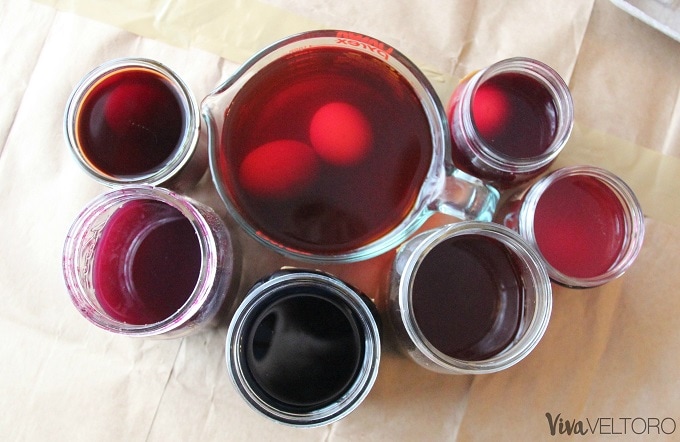
Each fruit or vegetable has to be boiled separately to create the dye. We tried seven different fruits and veggies so this took a bit! After cutting up the produce (except the berries-those I left whole), you add two cups of water and bring to a boil. Then let the dye simmer for 20 minutes. After simmering, remove from heat and strain using a cheesecloth or mesh strainer.
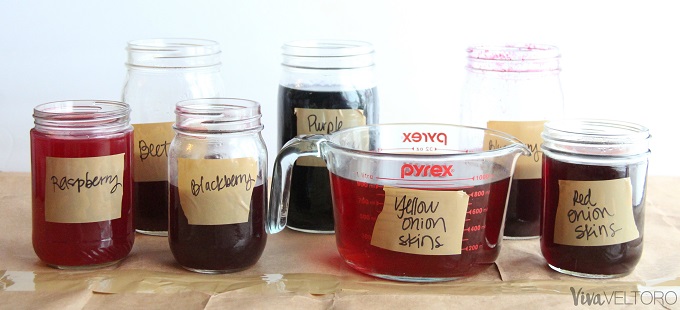
Label Your Containers!
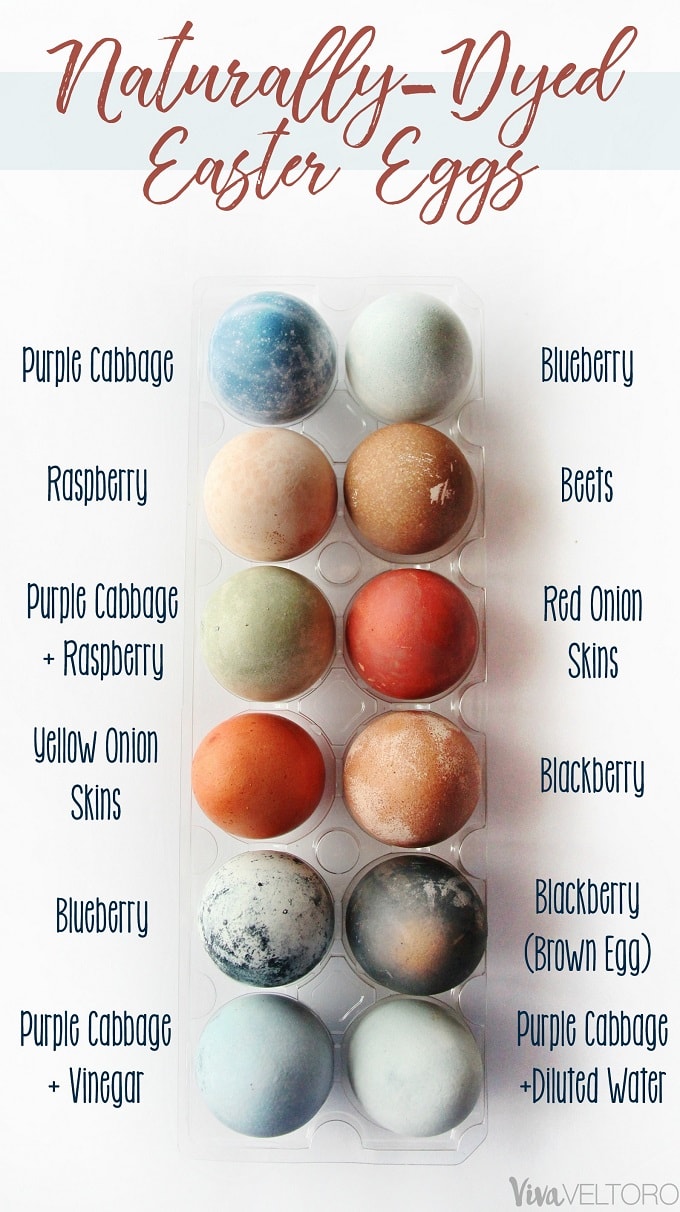
I made sure to label my containers because I knew I wouldn't keep them straight otherwise. Here's a list of fruits and vegetables we tried, but I'll let you know later which ones are actually worth trying and which were duds:
- Raspberry (½ pint)
- Blackberry (½ pint)
- Blueberry (1 pint)
- Beets (1 large beet, sliced)
- Purple Cabbage (½, sliced)
- Yellow Onion Skins (I bought one onion and then picked through the bin to get a bunch of skins. I probably used about about three cups of skins total)
- Red Onion Skins
OOPS! I forgot a step...
Now here's where I messed up a bit. You're supposed to put 1 TBSP vinegar in each dye to help the color bind to the eggs...and I totally forgot! Afterwards my husband was like "how much vinegar did you put in each one" and I went "ummmm....I forgot." SO, after the fact, I did add vinegar to the purple cabbage container with a new egg. The egg seemed to pick up the color more quickly (within an hour) though it didn't get as dark as the egg that had been in dye for four hours. In retrospect, I would recommend putting 1 TBSP of vinegar in each color but still checking the eggs to get them as dark as you want.
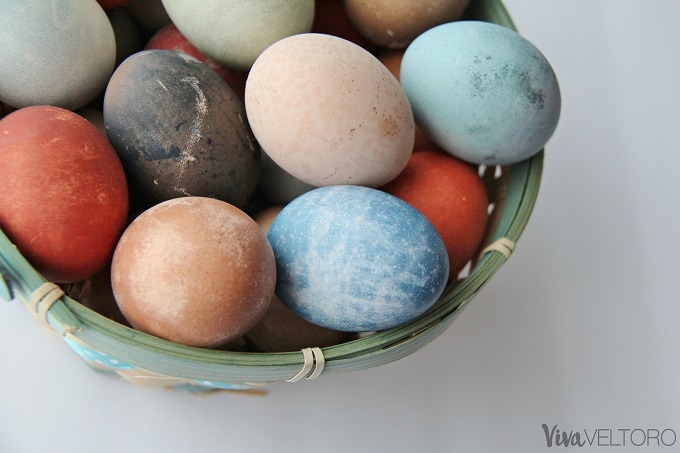
Once your dyes have cooled to room temperature, you can add your hard boiled eggs! I did cover my whole table with paper bags since our kids were "helping" with coloring and I didn't want my table stained. It made clean-up so quick and easy that I'll definitely be doing it for future egg coloring, too!
You can decide how long you want your eggs to sit in the color - I checked ours after an hour and decided they weren't ready, so I left them in for probably four hours total. Obviously if you want to eat the eggs afterwards, you should refrigerate them while they're in the natural dyes.
My Thoughts on Our Results
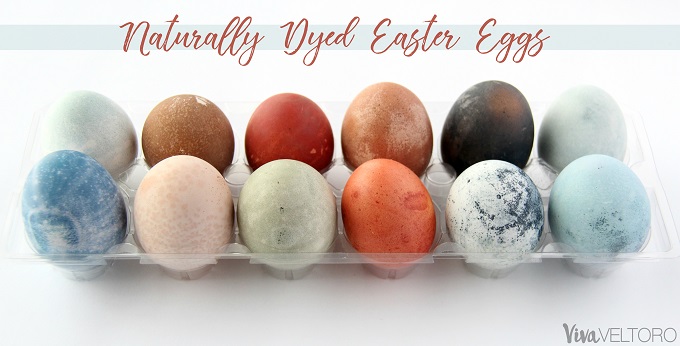
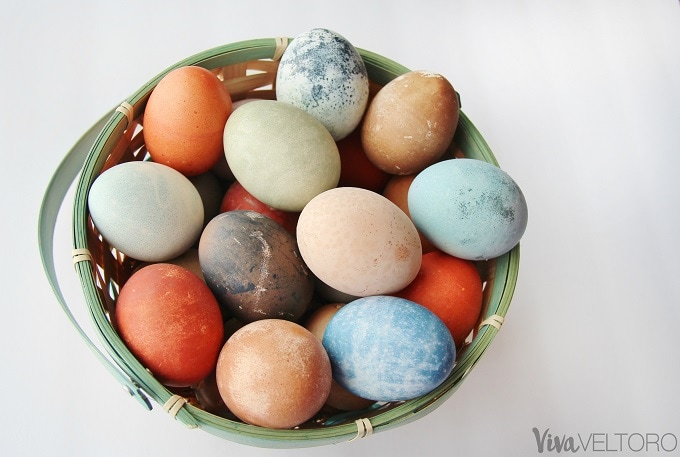
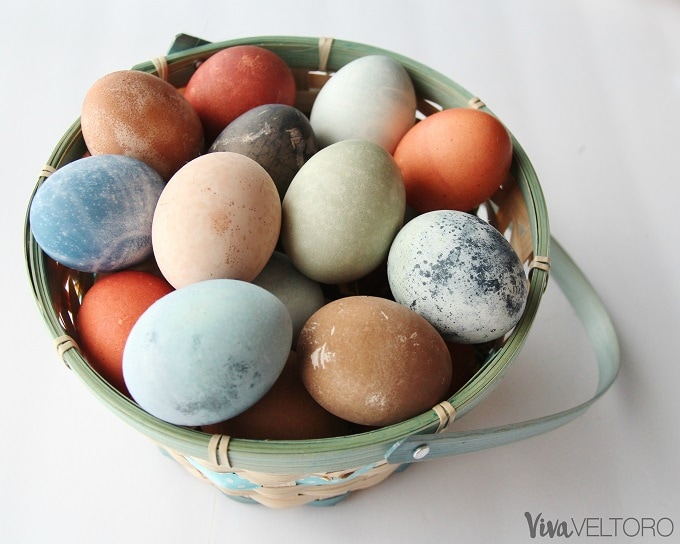
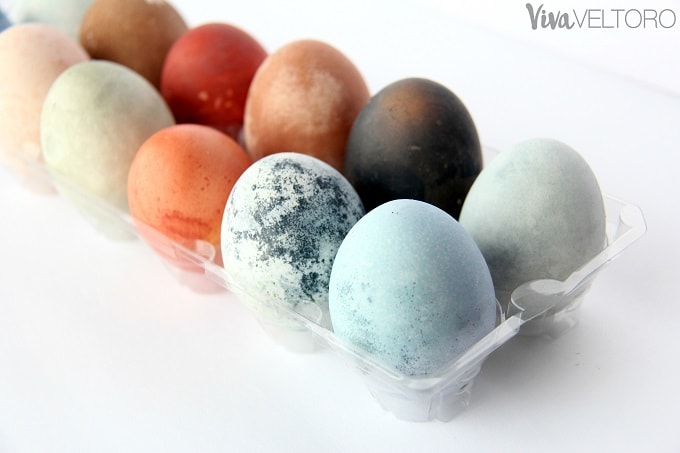
Overall I was so happy with how the eggs turned out! Some were better than others, and there are some dyes I wouldn't make again just because they didn't change the color of the egg much. Strangely, the fruits (blackberry, blueberry, and raspberry) created a film on the eggs but once wiped off, they lost most of their color. They still looked okay, but the colors didn't show as well as some of the other dyes.
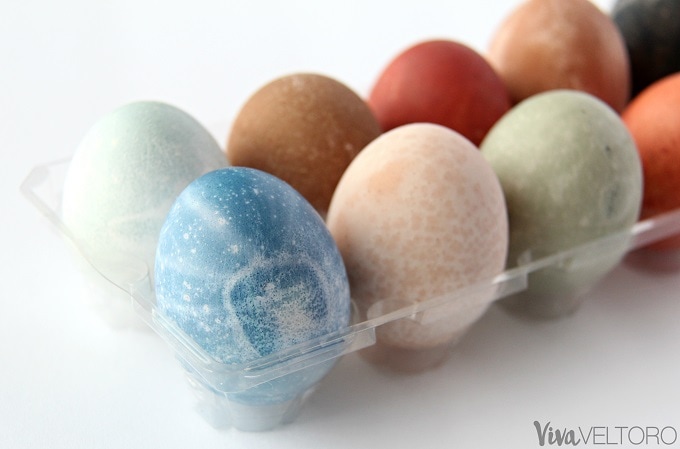
I really love how all of the purple cabbage eggs turned out. Honestly next year I think I'll make a whole batch of eggs in the purple cabbage dye, just because the blue is gorgeous!
Naturally Dyed Easter Eggs
We had a great variety of colors with this experiment. Even though the raspberries didn't color the eggs as darkly as I expected, we still got a pretty pink color with an interesting design. I expected beets to create a more vibrant (or even pretty!) color also, but the egg just came out brown.
I'm excited to expand on this project by adding rubber bands or stickers to them next time around. I think we could have some gorgeous centerpieces with these naturally-dyed eggs!
Hopefully this helps you decide which fruits and veggies you'll use for your natural Easter egg dyes!
Let me know in the comments if you'll give this a try!
Check out our other egg coloring posts below:
Toni Schlinsog says
These are beautiful!
Amber says
Thank you Toni!
Mia says
Not only are these so vibrant and pretty the activity is a science experiment for kids. How fun and educational.
Amber says
Thank you Mia! We had a lot of fun with it and our kids really enjoyed seeing the colors that came from each piece of produce!
Kari B says
I think the natural colors are incredibly beautiful!