I've been meaning to make a height chart for, well, about four years now. Somehow time has gotten away from me, but as I was browsing The Home Depot for light bulbs the other day I decided it was finally time! Check out how I made our wooden growth chart and how to transfer a quote with paint.
How to Make a Wooden Growth Chart
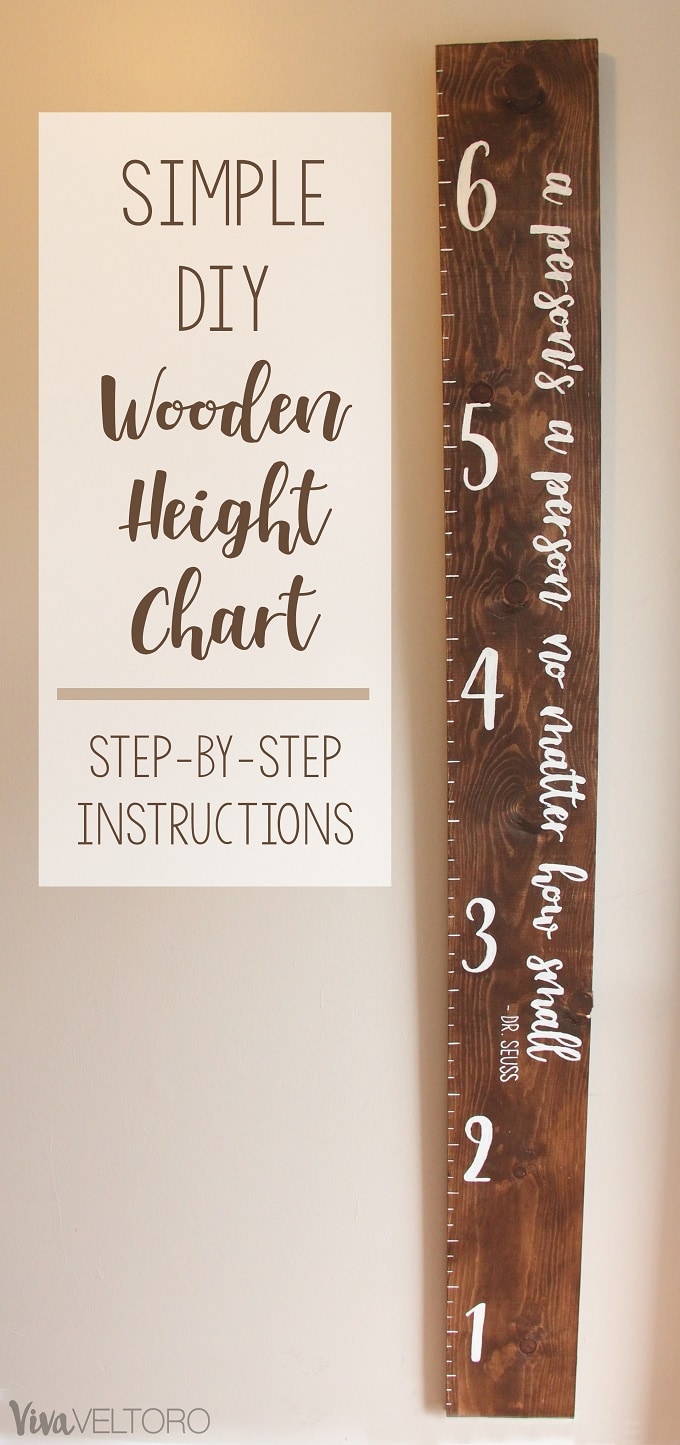
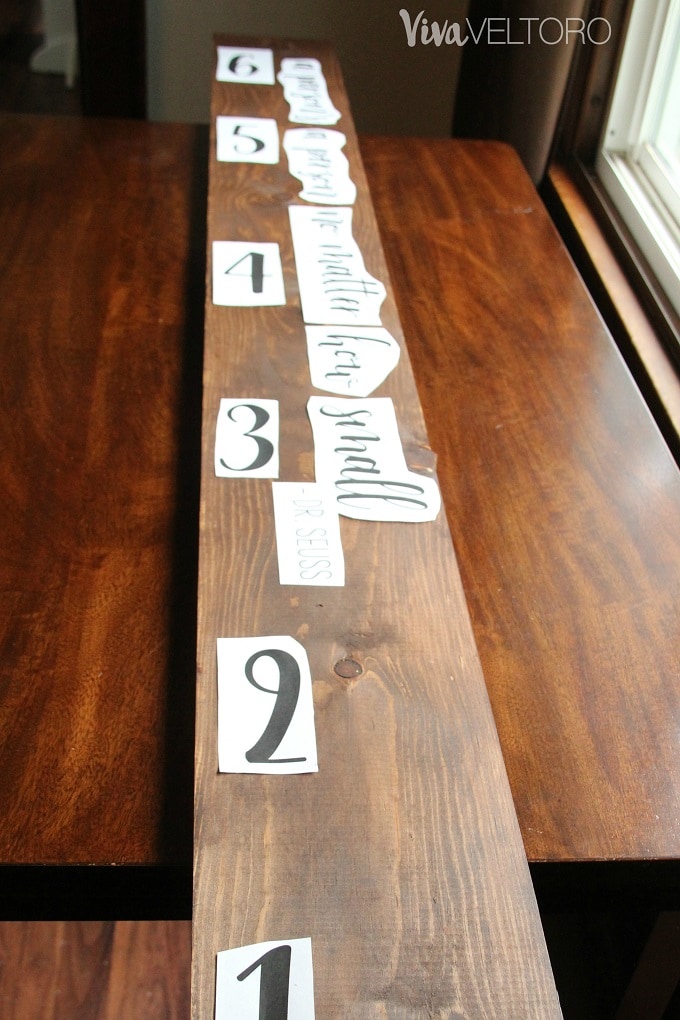
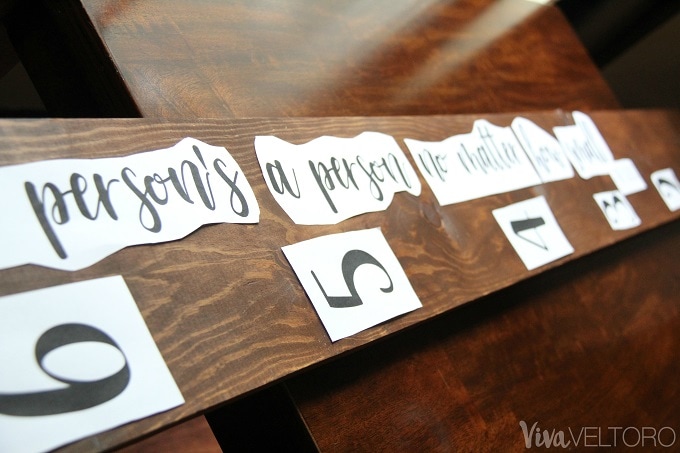
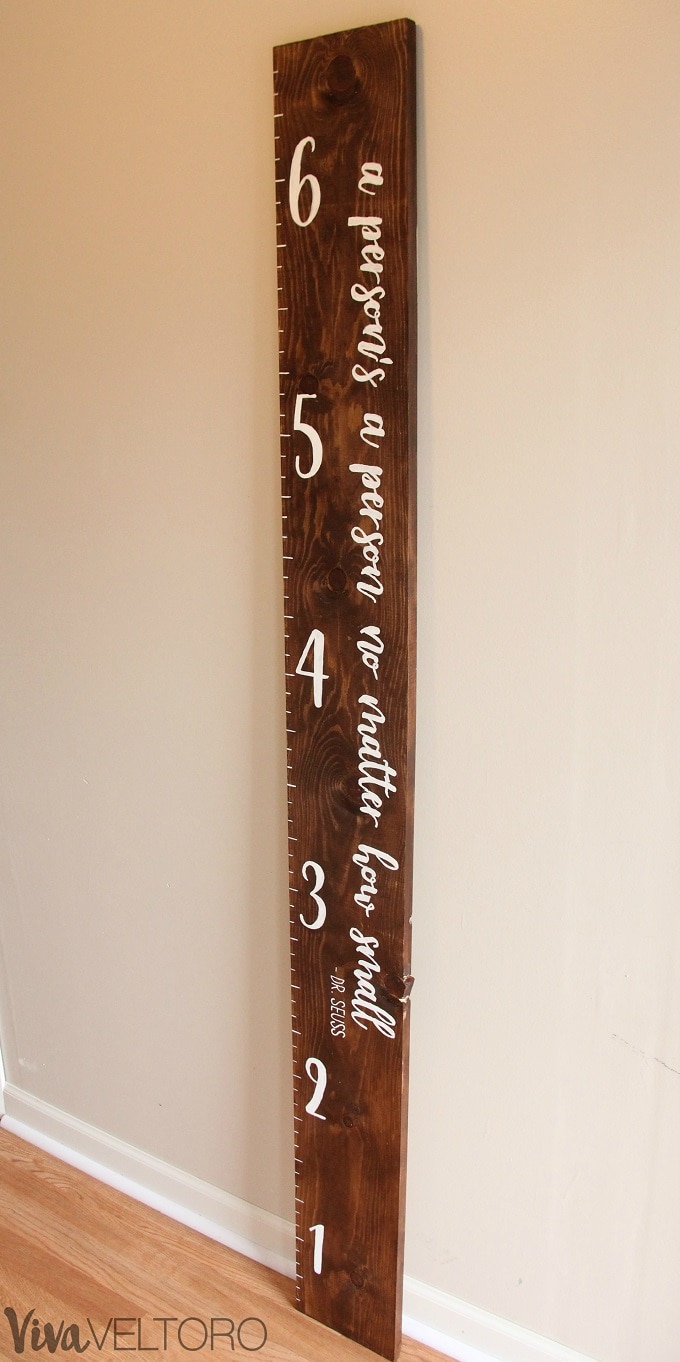
When I started browsing Pinterest for wooden growth chart ideas, there were a few that caught my eye. I like the look of stained wood with white details, but I wasn't sold on just a simple ruler design. I wanted to add something more personal to ours, so I thought a quote would be perfect. After searching for quotes and coming up with two that I liked, I asked our readers to vote on Facebook for their favorite. The quote I used, "A person's a person no matter how small" by Dr. Seuss won, and I think it fits perfectly on our growth chart!
Supplies you'll need for this project:
Wooden Board (I chose a 1" x 8" x 6' simple pine board)
Stain
Stain brush or old rag
Tape Measure
Pencil
White Paint
Paintbrushes (various sizes)
Printed Numbers and Quote
White Chalk
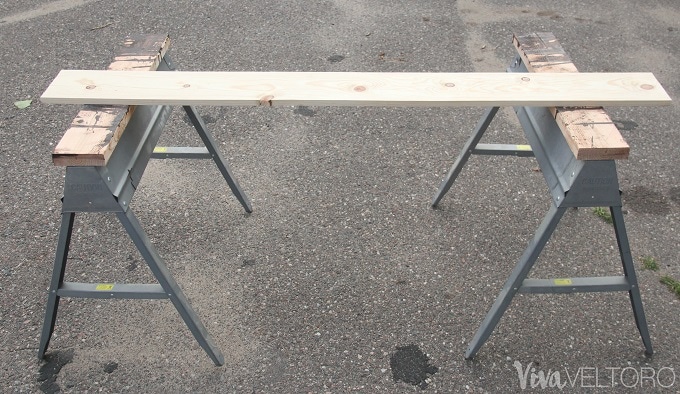
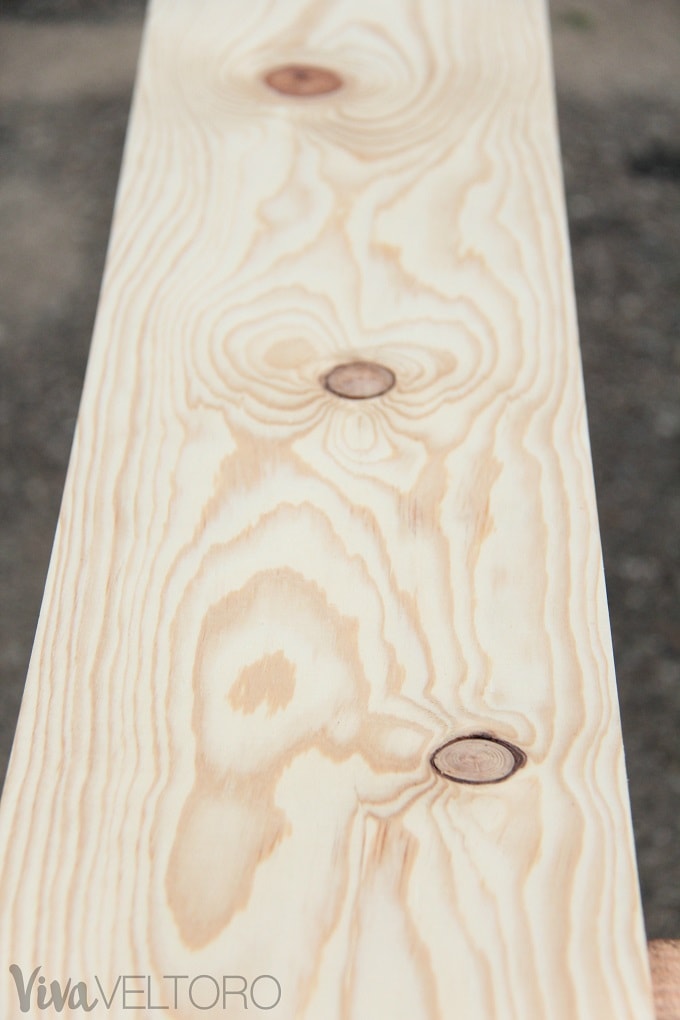
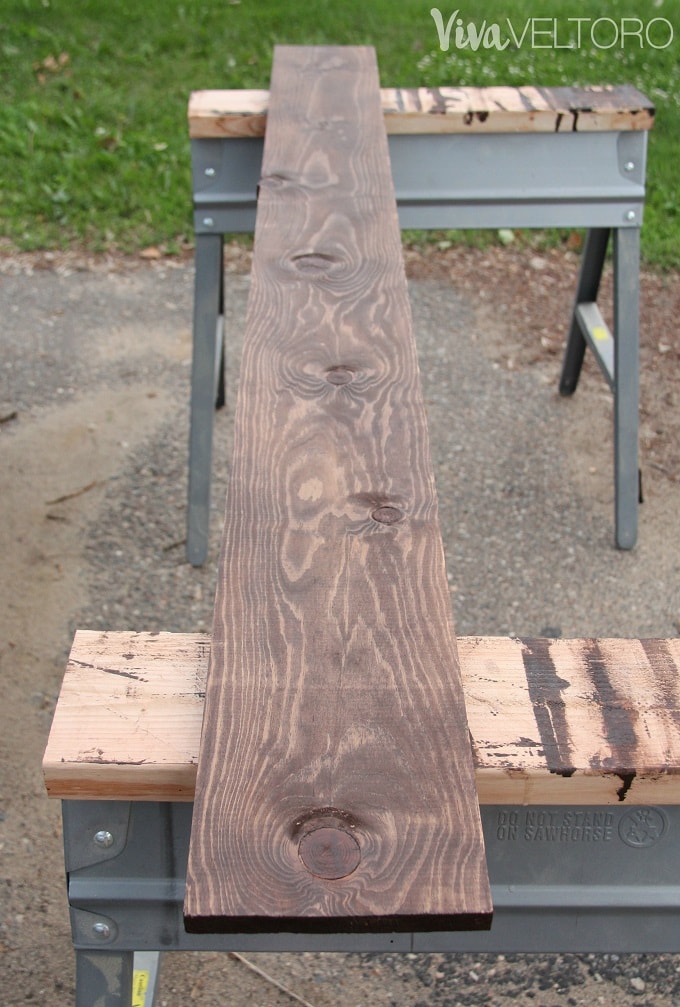
I started with this simple plain pine board. The knots in this piece were what drew me to it, and it was also less than $4, which was a bonus! The imperfections look really neat through the stain.
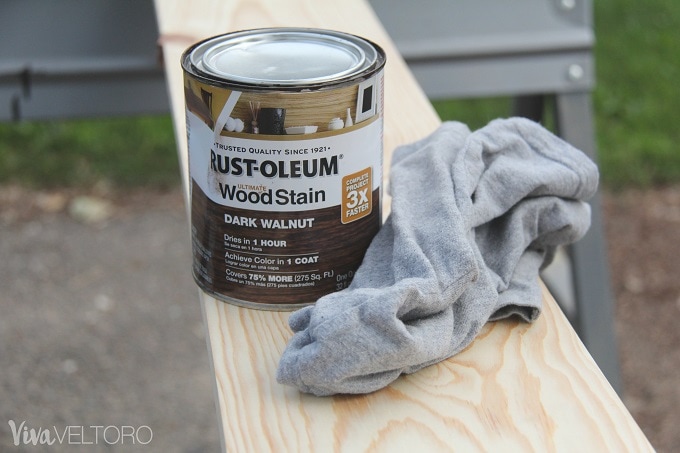
I had some leftover stain from when I made our king-sized wooden platform bed frame and headboard. I used very little for this height chart and have plenty to use for other projects! This color is Rust-Oleum Ultimate Wood Stain (Dark Walnut) and I love it. I used one of my son's old shirts as a rag to apply one coat of the stain.
I didn't put any sort of polyurethane on the growth chart after staining it. The board dried overnight so it was ready for paint the next day!
Painting the Growth Chart
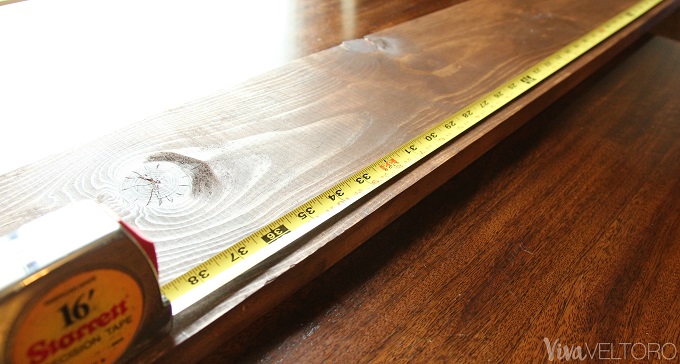
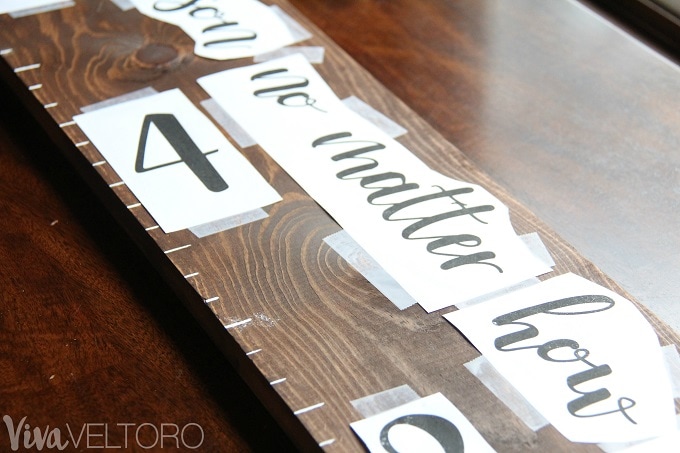
I used a tape measure and pencil to mark out lines by the inch. Then I chose the fonts for the numbers and the quote. Here's a free printable of the numbers and the quote (and the second page for the quote). I cut out the text and moved the pieces around on the board until I was happy with the layout.
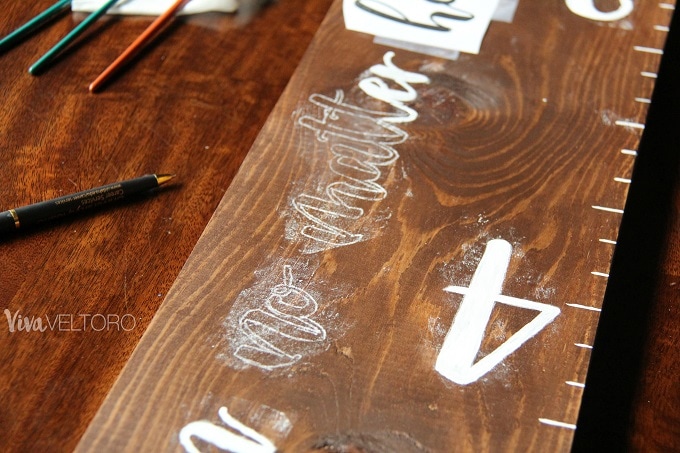
I used a flat ¼" brush to paint the lines and while I wasn't a perfectionist, I did try to keep them straight and even. Then it was on to transfering the text. It's an easy process but is best explained through photos! First, you color the back of your wording/numbers with white chalk. Like really, cover the whole backside of your letters and numbers.
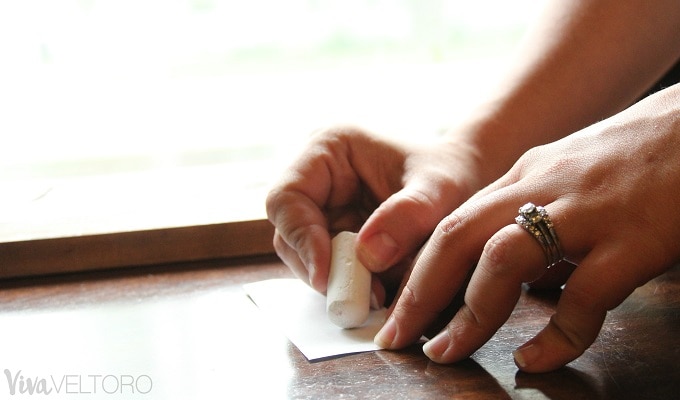
I just used my kids' sidewalk chalk which worked great (and it was free!). You can buy cheap chalk from Amazon if you don't have sidewalk chalk. Then lay your text out and tape everything in place.
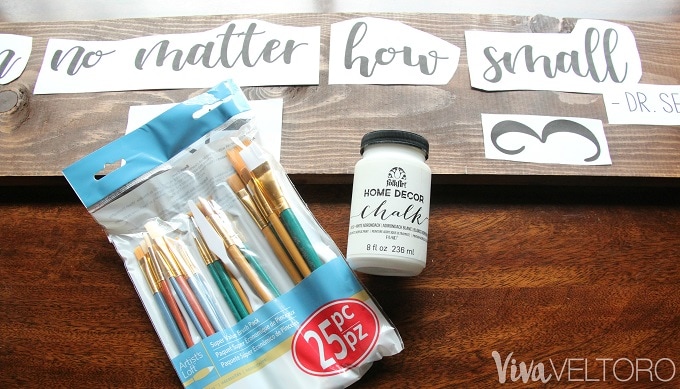
I bought a cheap set of paintbrushes from Michaels, but this set is comparable. The paint is FolkArt Home Decor Chalk in White Adirondack. I love chalk paint because you can apply it and then distress it if you want! I didn't for this project but I have a few ideas for future crafts I want to make.
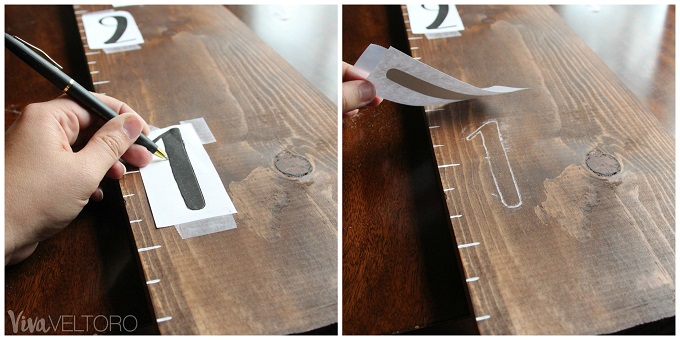
Once you've taped our text down, use a pen to trace around each letter or number. The chalk will transfer onto the board and when you lift the paper, you'll have an outline to paint!
It took me about an hour to transfer and paint all of the letters. My hand actually got sore from all the precision painting!
Once the paint dried, it was time to hang the growth chart! I have a whole wall in our upstairs hallway that I want to decorate, and this chart is just one part of it. I really love how it turned out, and since I had most of the supplies it cost me less than $10 to make!
I'll update this post once we secure the growth chart to the wall. For now, I have big plans for it and a few other decor pieces! I bought fine tip paint markers so we can start tracking our kids' heights and I'm going through their baby books to add their heights from previous years. I can't wait to watch them grow (but hopefully not too fast!).
Tamra Phelps says
This is really nice. I like that real wood look and adding the Dr. Seuss quote is an added bonus.
alex says
What font did you use?
Amber says
The text is Bromello!
Marcelo says
Hi loved his! Which font have you used?!?!
Amber says
Thank you! I used the font "Bromello"!
Sarah says
I love this! We used it for our niece a few years ago for a Christmas present and now we would like to make one for our own kids but would like to use a different verse. Can you please let me know what size the font is? Thanks in advance for your help!
Kristen H says
I love this idea! I've been searching high and low for a cute growth chart idea. The ruler is by far my favorite. The rulers I've found for purchase were minimally $150, and not nearly as cute as this.
Im going to make this my next project. Thank you for the step by step instructions and pictures!