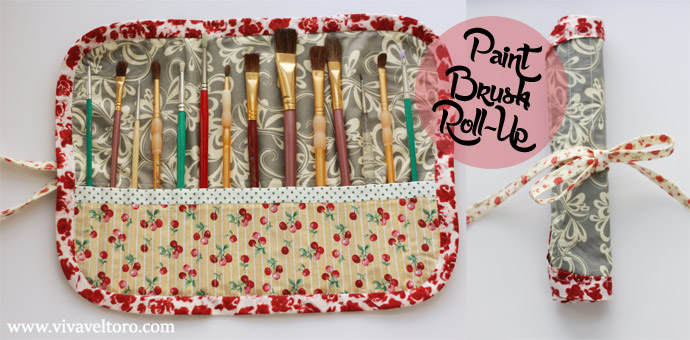
I love to paint! Do you remember the egg shell garden and wooden pennant banner? There are oh so many more painting projects coming up here on Viva Veltoro! Just wait until I show you some painted peg dolls and my kitchen table! After several years of painting projects, I have a handful of brushes and no good way of storing them. I've been keeping them in a Pringles can since I left home. This week I decided a paint brush roll-up would be just the ticket.
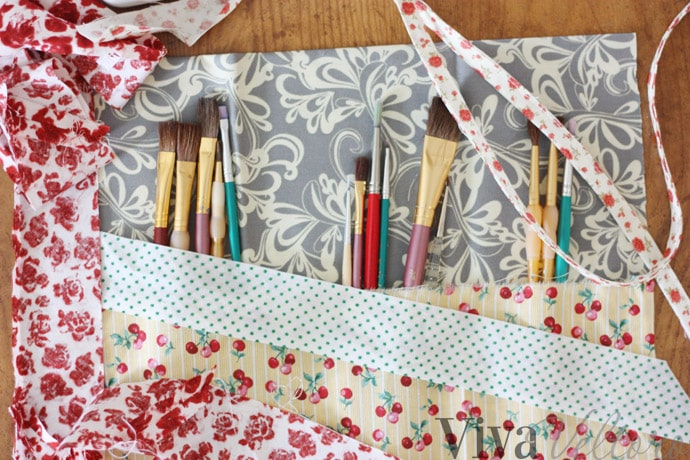
The first step is to round up a bunch of scraps. The length and width of your final product will depend on the height of your brushes, and how much you will be storing. My base (the gray swirl fabric) came out to be 10" by 13" with the pocket (the yellow stripe cherry print) at 4.25" by 13".
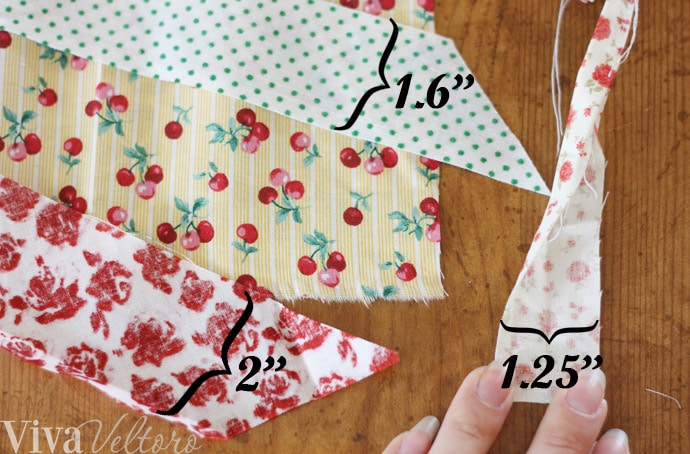
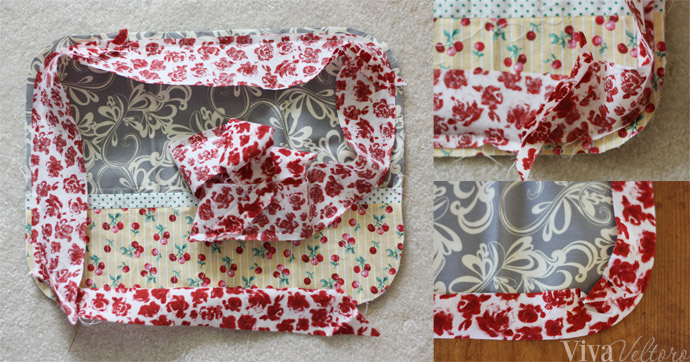
Above you'll see the dimension of the other strips. Feel free to change these up if you want thicker bands anywhere. Note that since the red and white floral is going to go around corners, it must be cut on the bias!! This will allow it to stretch around the corners nicely since a bias cut has a lot of stretch.
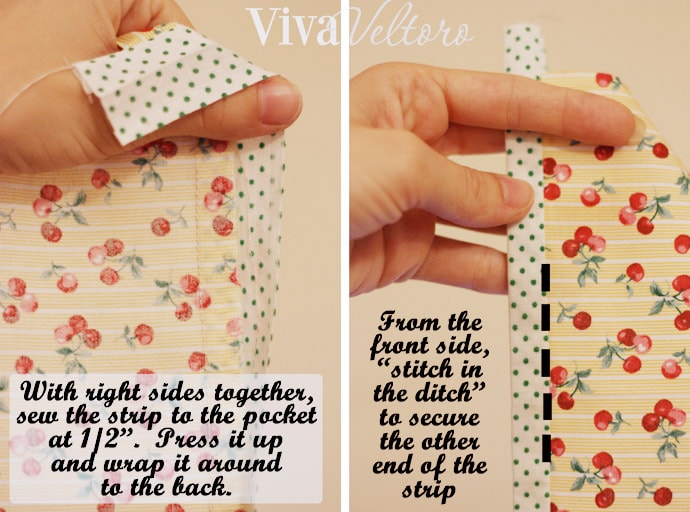
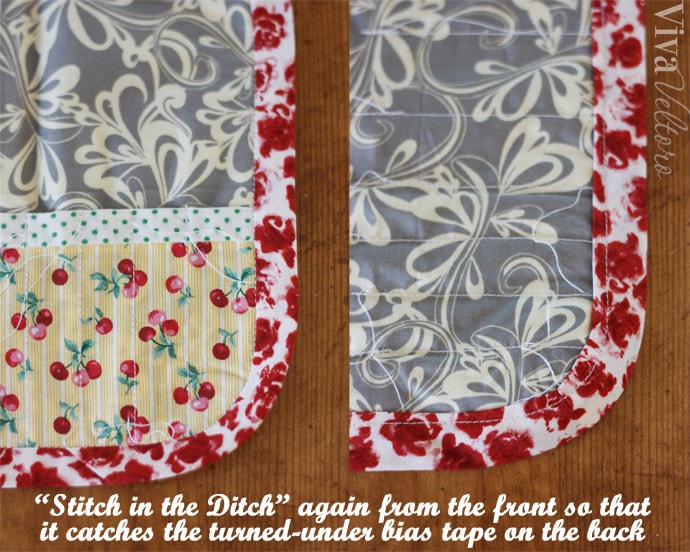
Ok, below you'll see my favorite way to finish an edge. Follow these directions to get a clean, enclosed finish with a cute contrast trim.
Now sew the pocket directly on to your base around the perimeter.
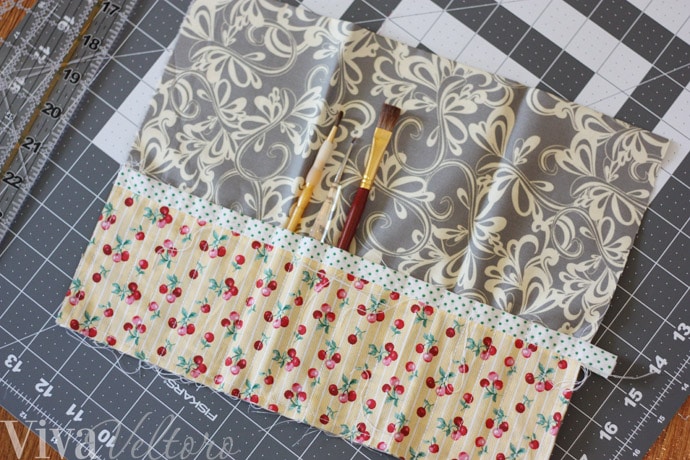
Next, you're going to sew lines up your pocket to create the spaces for your brushes. Choosing a fabric with lines in the design made this extremely easy. I totally suggest using a stripe for this portion of your roll-up. If not, you might consider marking straight lines with a disappearing ink pen. Again, the width depends on your brushes--whether you're making this for paint brushes, makeup brushes, crochet hooks, or other supplies. I made a few of varying widths to allow for larger brushes.

Last comes the tricky part. You're going to wrap this bias-cut strip all around the circumference as you sew. Don't stretch it around the corners. Rather, gently push as much extra fabric as you can into those curves without creating a crease. When the two ends meet, sew them together on a diagonal and cut off the extra. Gently fold your strip around to the back and iron as you go to make it crisp from the front.
On the back side, fold under the edge and iron it down, wide enough to be caught by the "stitch in the ditch" stitching you'll do from the front.
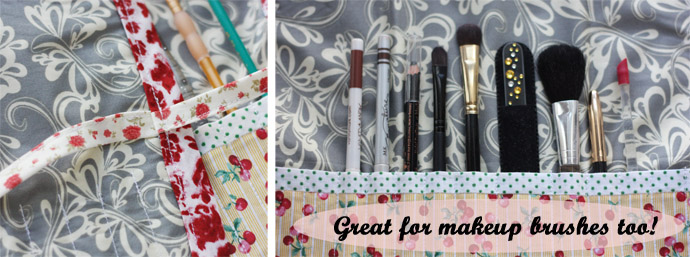
The finishing touch is the tie. I tucked the two ends into the bias tape before passing over it in the machine, which stapled it down fine. Backstitch to be safe.
Done! This really is a quick job, especially if you want to purchase pre-made bias tape and not bother making you're own.
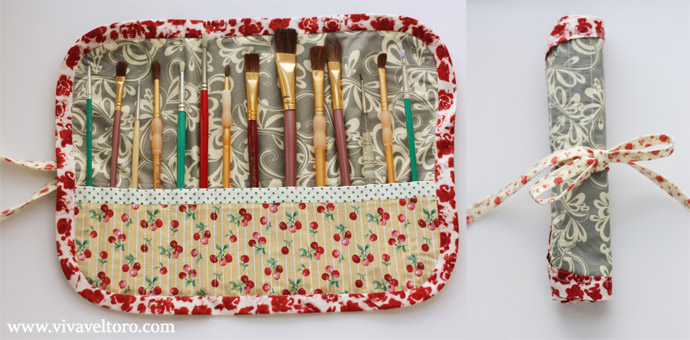
Use it to hold paint brushes, makeup brushes, crochet needs, pens, colored pencils, or any other supplies! What a cute bundle to tote around!
Cami says
This is such an awesome tutorial! I hate when my expensive brushes get crushed!
Cami says
This is such an awesome tutorial! I hate when my expensive brushes get crushed!
MaryAnn says
This would make a great case for crochet hooks! Thank you!